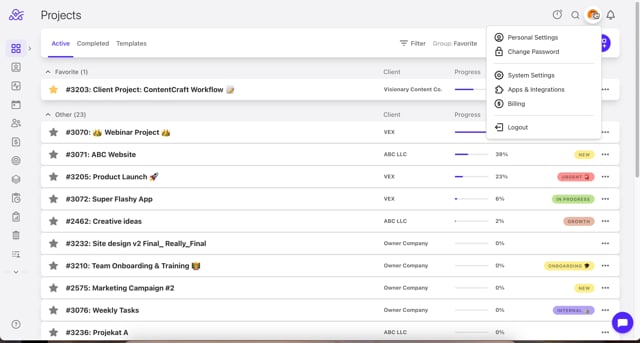
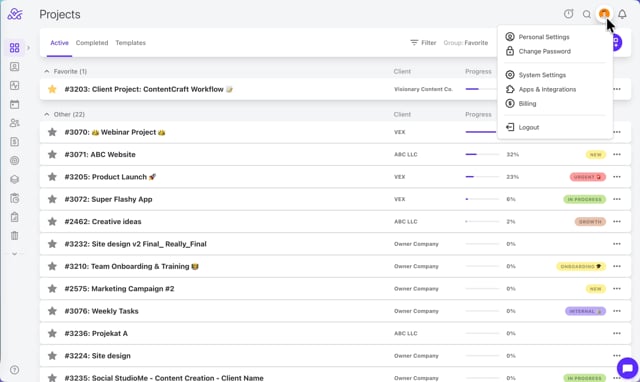
The Apps & Integrations page lets you add optional features and third-party integrations to ActiveCollab.
Video tutorial: https://vimeo.com/1150682981
Desktop app
Run ActiveCollab as an app on your Mac or Windows computer. When something happens on your account, you’ll be notified with a pop-up notification.
Setting the Desktop app for Self-Hosted

The Desktop app is also available in the self-hosted accounts under Add-Ons. It is available for Mac and Windows.
- Download and install the app,
- Open the app and go to Help > Developer > Change Start Page,
- Change the URL to the Self-Hosted,
- Log into your Desktop app.
- Video Tutorial: https://vimeo.com/1154784881
Payment Processing
ActiveCollab supports several payment services so your clients can pay their invoices online.
- PayPal Express Checkout - clients can pay using their PayPal account,
- Stripe - You can easily connect your Stripe and ActiveCollab accounts via the Secret and Publishable APIs.
How to change the online payment processor?
To change the payment processor, you need to disconnect from the one that is currently in use.
- Click on your profile icon then Apps & Integrations
- Click on the desired payment processor to disconnect
- Change to a different payment processor
Paying an Invoice by Credit Card via Stripe
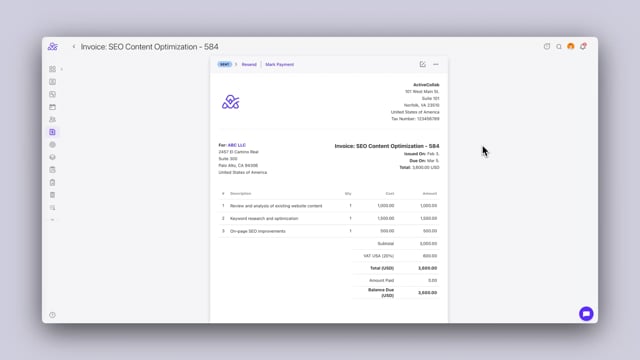
ActiveCollab allows invoices to be paid by credit card through Stripe using a Public Invoice Link. This enables clients to pay invoices without logging in to ActiveCollab.
How to Pay an Invoice via Stripe
- Open the invoice in ActiveCollab
- Click the three dots (⋯) in the top-right corner of the invoice
- Select Copy Public Link
- Open the copied link in a new browser tab or share it with your client
- On the public invoice page, click the Pay with card button at the top of the invoice
- A Stripe payment window will open
- Enter the required credit card details and click Pay now
- Once the payment is completed, the invoice will automatically be marked as Paid in ActiveCollab
- Video Tutorial: https://vimeo.com/1163660657
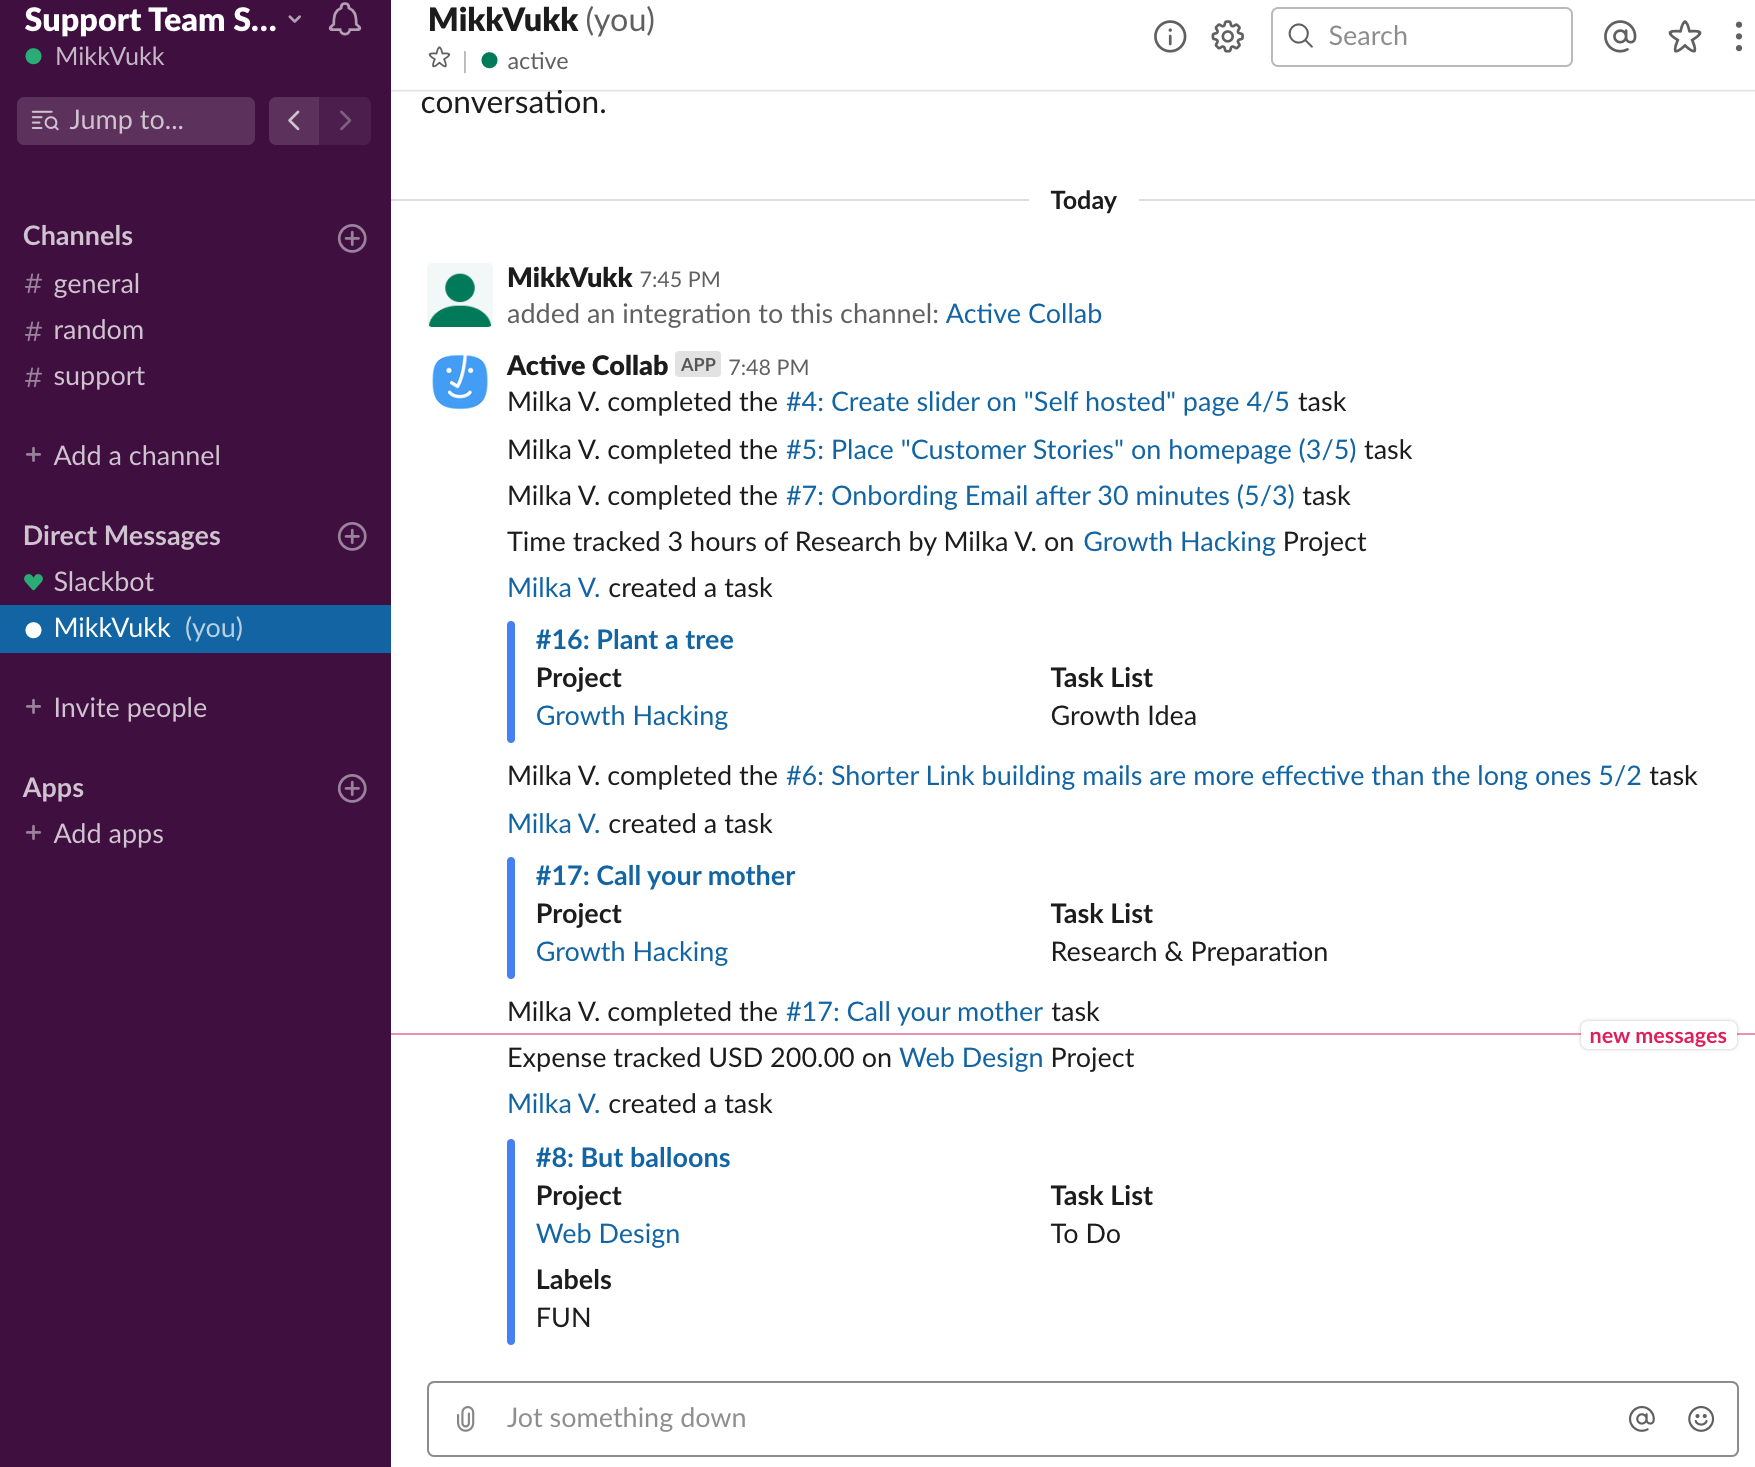
Slack
ActiveCollab can post updates from your projects to a Slack channel so you can receive notifications whenever:
- A task is created, completed, copied/duplicated, and moved to a task list,
- Time and expenses are logged,
- A user is invited and when they accept the invitation,
- A project is created (if "All projects" is selected).
To receive updates in Slack for cloud users:
- Log in to Slack from your web browser,
- Log in to ActiveCollab and click on Slack under Apps & Integrations,
- Click on Add New Slack Channel
- Choose the channel where you want to receive updates
- Video Tutorial: https://vimeo.com/1159726324
To receive updates in Slack for self-hosted users:
Before enabling Slack, you need to provide Client ID and Client secret. To get those:
- Create a Slack app,
- Fill out the basic information,
- For instructions and support links, use the link to this help page,
- For the Redirect URI, use the link to your ActiveCollab (eg. https://youractivecollab.com).
When you create the app, you'll see your Client ID and Client secret that you can paste into ActiveCollab. Then:
- Log in to Slack from your web browser,
- Log in to ActiveCollab and enable Slack under Add-Ons,
- Choose which projects to include and click Connect,
- Choose the channel where you want to receive updates and click Authorize.
You can add more connections between different projects and channels or push notifications as direct messages to a certain team member.
If you disconnect the add-on, you'll have to reconnect all the channels and project when activating the add-on again.
Note:
Anyone invited to the channel will be able to see notifications about all tasks, including the ones marked as "Hidden from clients". However, only users with the right permissions will be able to open them in ActiveCollab.
Webhooks
Webhooks can notify 3rd party services about what's happening in ActiveCollab. To push data back to your ActiveCollab, use our API (webhooks can only take data from ActiveCollab).
The URLs specified here will be triggered with a POST HTTP request when:
- A new Project, Discussion, Task, Comment, Note, or Company is created.
- A Task is edited, copied/duplicated, completed, or moved to a different Task list or a Project.
- A new user is invited or accepts the invitation.
- A new File is uploaded.
- A Time record or Expenses are logged.
- Something is moved to or back from the Trash.
A 3rd party app sends a POST HTTP request to a webhook in ActiveCollab and receives a JSON payload; the format depends on the webhook and can’t be changed.
JSON payload format:

To add a new webhook:
- Click Add New Webhook,
- Enter the Description of your webhook,
- Enter the Target URL from which your app receives POST requests,
- Enter the Secret used for authentication (optional),
- Click Add New Webhook.
- Video Tutorial: https://vimeo.com/1159728508
Zapier

Zapier lets you create custom workflows by connecting ActiveCollab to thousands of web apps. After enabling the integration, you’ll be able to create “Zaps” that trigger events when something happens in ActiveCollab.
After enabling the integration under Add-Ons in ActiveCollab, go to Zapier and create a new zap with ActiveCollab.
ActiveCollab can either be the "trigger" (doing something in ActiveCollab does something else in another app) or the "action" (when something happens in another app, it triggers an action in ActiveCollab).
Video Tutorial: https://vimeo.com/1159729837
QuickBooks
You can connect ActiveCollab to your QuickBooks Online account. Then the invoices you create in ActiveCollab will be sent to your QuickBooks account for further processing (learn more).
Video Tutorial: https://vimeo.com/1150844167
Google drive
You can attach files from your Google Drive account to tasks, discussions, notes, and comments just like regular files. In that case, when you click on the attachment, you'll be redirected to Google Drive.
Before you attach a file, make sure you set the permissions right in Google Drive so others can open it. ActiveCollab treats the attachment as a link and doesn't have anything to do with the permission system behind the file. This also means ActiveCollab won't be able to generate a preview for Google Drive attachments.
Once you disconnect the add-on, Google Drive files will remain attached in ActiveCollab; the only difference is, you won't be able to attach new Google Drive files.
Enabling Google Drive on Self-Hosted:
You need to create an app on Google Drive and then copy and paste the client ID and secret:
- Go to Google Drive API (link),
- Click Create a project,
- Set the project’s name, ID, and location, then click Create,
- Click Enable,
- Go to the Credentials page,
- Click Create credentials and select OAuth client ID,
- Click Configure consent screen,
- Under the Product name shown to users, enter whatever you like,
- Under Create client ID, choose Web application,
- Enter name and under Authorized JavaScript origins enter URL of your self-hosted ActiveCollab, then click Create,
- Copy and paste your client ID and client secret in ActiveCollab -> Add-Ons -> Google Drive.
Note:
You can always get this information again by returning to your Credentials page.