
Almost every collaboration platform lets you invite people to your workspace in seconds.
What happens when you need more time to prepare for onboarding?
Say you’re having a new team member joining you in a couple of weeks or a client under contract starting in a month.
No matter which platform you’re using, you will have to wait until the very last minute to onboard new team members, clients or even freelancers.
That’s why ActiveCollab created Virtual Users. So you could prepare for future onboarding, capacity planning, and new clients. In your own time.
Let’s see what Virtual Users are, and how they can help you not go crazy one hour before your new member arrives.
What are ActiveCollab Virtual Users?
Virtual Users are ActiveCollab’s signature feature designed to help you plan capacity and prepare for future new team member and/or client onboarding.
Think of them as placeholders, reserving a spot for someone who’ll join your workspace some time in the future.
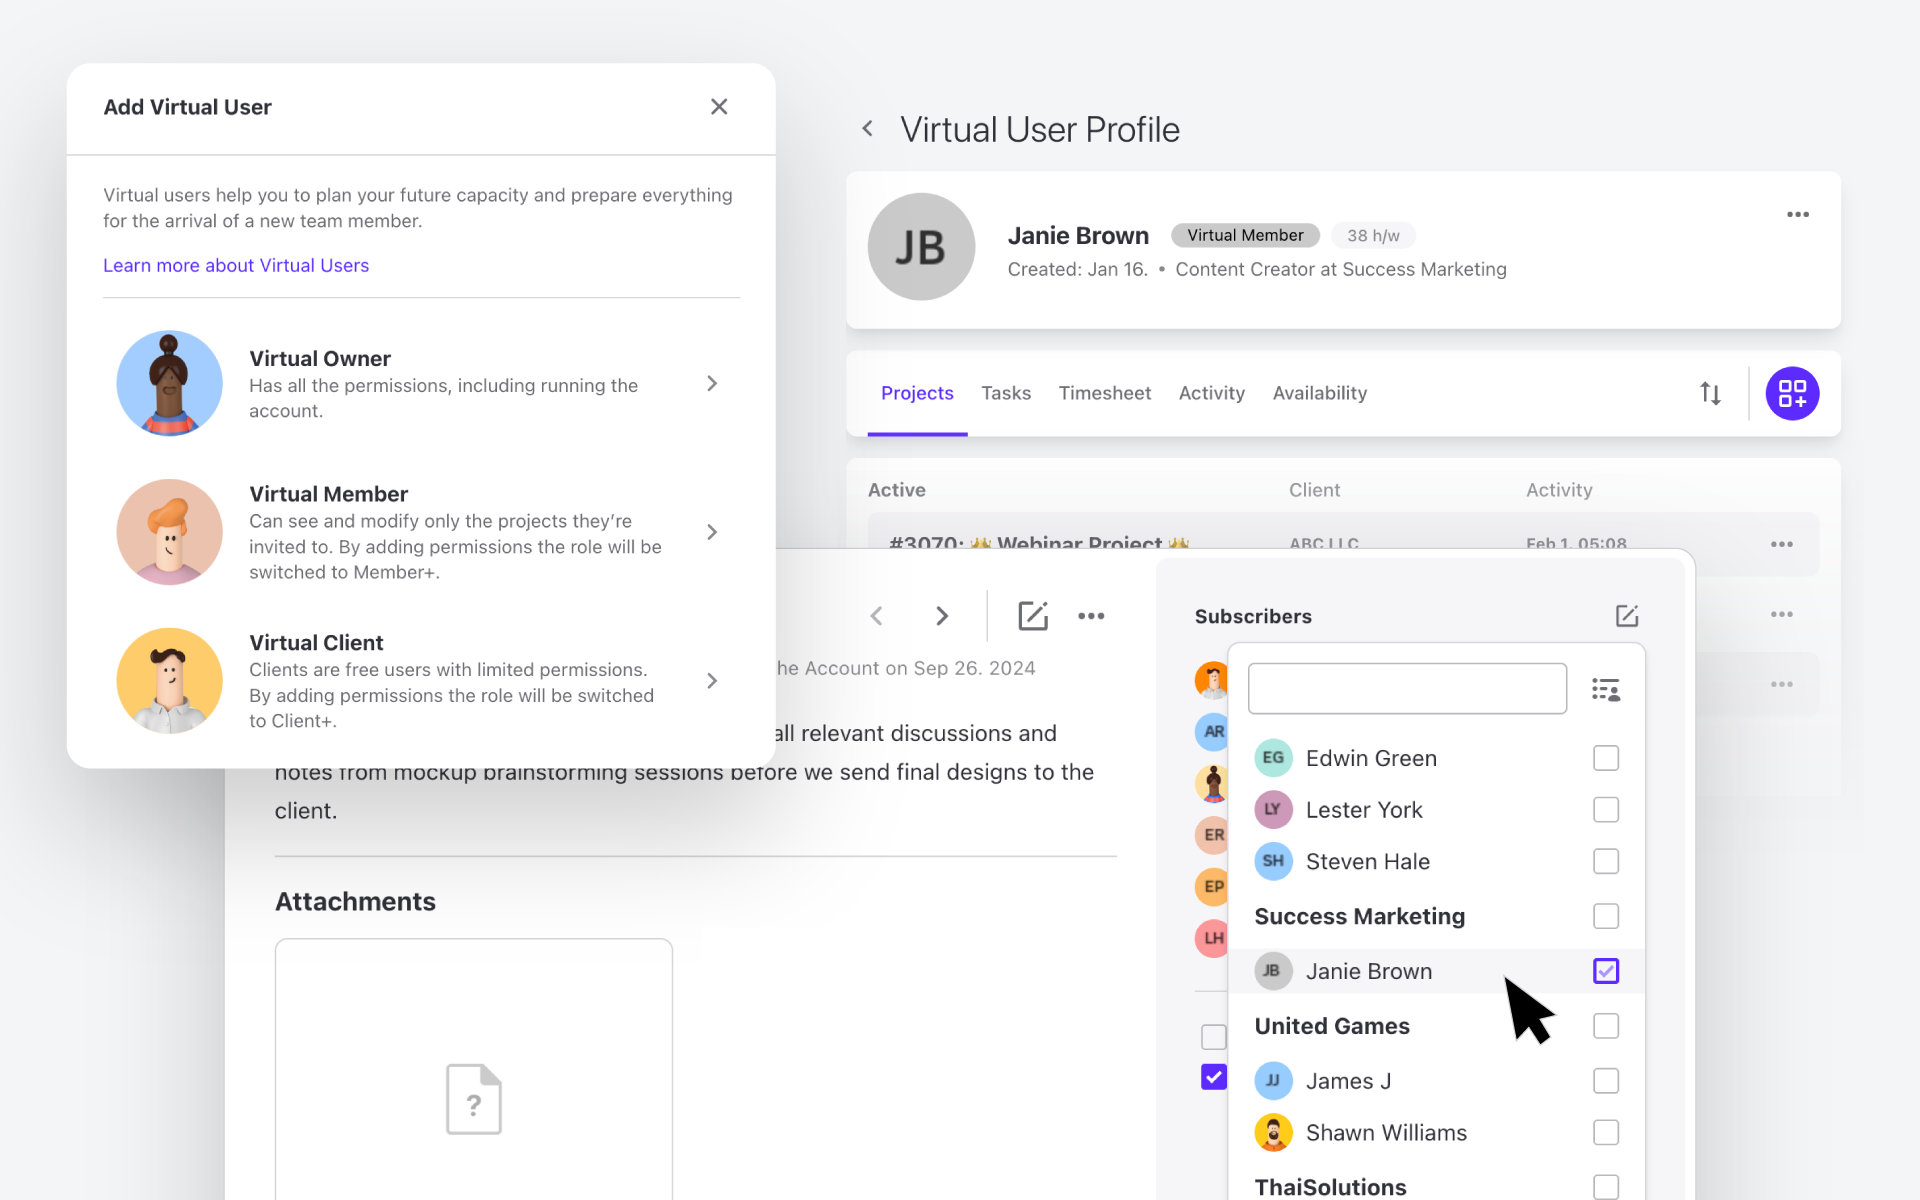
Virtual Users work like regular users, except that they are completely free. You can create virtual users for any role you want:
Owner—if you’re hiring a senior member,
Member—if you’re hiring a team member,
Member+—if you’re hiring a team member with additional permissions,
Client—if you’re onboarding a client,
Client+—if you’re onboarding a client with additional permissions.
While you can set a virtual user’s daily rates and capacity, add them to projects, assign tasks to them, and more, only the person whom you send the invitation email with a login link to can activate the account. At that point, they become regular, chargeable users (except for Client roles, which are always free).
You might be wondering when it would be better to create virtual users instead of regular ones. Read on to find out.
When to create Virtual Users?
Virtual Users can be a much better option in many situations. By creating a virtual user, you’ll save yourself both time and money, while keeping tabs on your current and future human resource needs.
Onboarding new team members or clients
Before you invite a new team member to your ActiveCollab workspace, you want to make sure all is set up for them, so they’re ready to start onboarding right away.
With Virtual Users, you can:
share all onboarding materials with your new team member,
add your new team member to relevant projects, tasks, notes, and discussions,
create and assign tasks for them before they arrive,
add your new team member’s information, such as availability and rates, to help you plan, and organize your workload,
give them additional permissions (to start projects, manage people, use reports, manage time and finances), so they become a Member+ once logged in.
All of this will simplify your onboarding process, and ensure a positive experience for the new hire.
Similarly, when you’re onboarding a new client, making sure you prepare everything in advance is crucial to avoid omissions, and leave a good first impression.
Create a Virtual Client, and:
prepare all necessary documents and files, notes and discussions ahead of time,
mention them in relevant tasks, so they can take part and provide input,
give them permissions to create and be assigned tasks, for a better feedback and approval workflow,
have all relevant billing and project info verified prior to your client’s arrival.
Once your client has logged in to your ActiveCollab workspace, they’ll find everything nicely organized, and you’ll be ready to start the project much faster.
Overhead planning and assessments
If you want your business to grow, you need to stay on top of all your activities and costs.
Virtual Users can help you better plan these:
Assign overhead tasks to a virtual user to understand how much time and resources are spent on them.
Compare the actual workload against your current capacity.
Make virtual users task placeholders to assess project capacity and feasibility before assigning the task to real users.
Create an action plan based on assessments and data.
Consolidate your human resources to optimize workload distribution and ensure project success.
Detect critical points (high overhead costs, unnecessary tasks), and adjust processes accordingly.
Freelance workload monitoring
If you work with freelancers, you might decide not to invite them to your workspace for privacy and confidentiality [or any other] reasons.
However, it’s still important that you monitor their work and progress, so you know whether doing business with them is worthwhile.
You can create a virtual user for a freelancer, and add all their information there. From capacity, internal hour rates, to job types, tasks, and projects—you’ll keep track of everything. You can even add time records manually, so you make sure the relevant data in your system is accurate and consistent with the freelancer’s.
If you ever decide to welcome them to your workspace, you can do it in a few clicks. The best of all? All their work history will already be there.
Virtual User FAQ
How can I create a Virtual User?
Creating a Virtual User in ActiveCollab is easily done in a couple of clicks. If you have an Owner or a Member+ role, you can add a Virtual User by clicking on the + icon in the People Section.
You’ll be asked to add the virtual user’s name, company, title, as well as additional permissions.
Additional permissions for members include the possibility to start projects, manage people, and use reports, manage time and finances. This is super useful in case you want to create a virtual-user-to-become-a-member who should have advanced access to your workspace, but not full control of it.
You can also assign virtual users to projects, and define their capacity, job type, and internal hourly rates. This is all necessary information, especially if you’re working with freelancers.
If you’re creating a virtual client, you can choose to let them create tasks and be task assignees, which is great if you like to keep clients included in relevant projects, for their input, feedback, and approvals.
What can I do with Virtual Users?
Once you’ve created a virtual user, you can add them to tasks, notes, and discussions directly from your workspace. To do that, simply head over to a specific task, note or discussion belonging to a project the virtual user is part of.
With this option, when your new team member or client comes in, they’ll automatically have access to all relevant projects, tasks, and discussions. By doing all of this beforehand, you’ll have enough time to double-check everything.
Where do I locate Virtual Users in my workspace?
You will easily detect virtual users across your entire workspace because their avatars are gray. You can also find all Virtual Users you created under Invites in the People section. They will also be on the People list, with a gray Virtual User label next to their name.
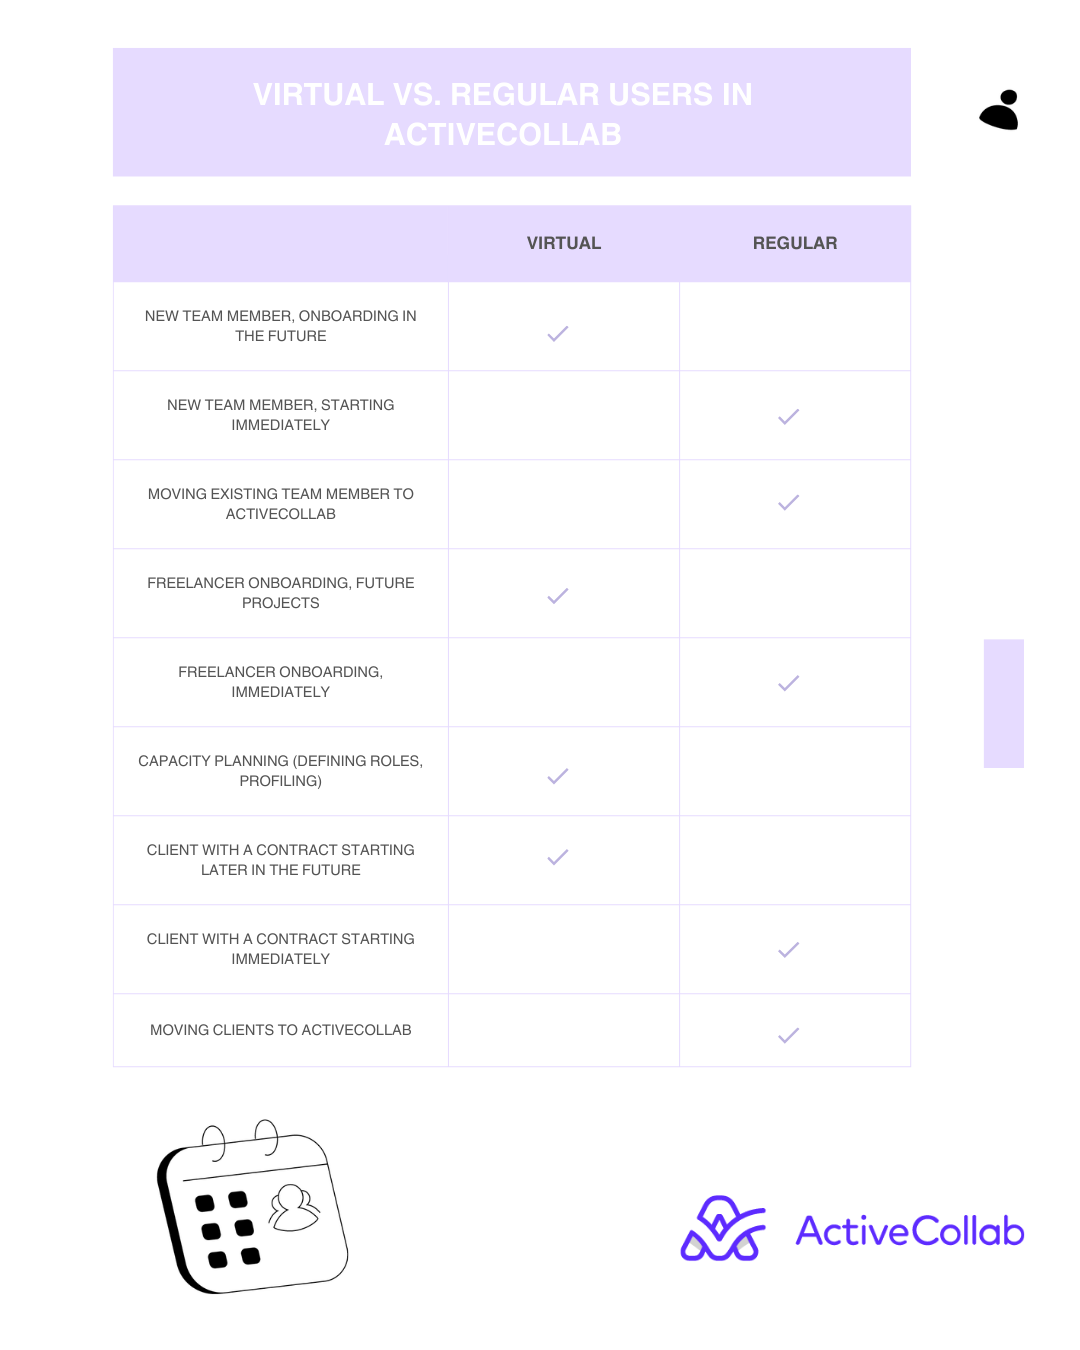
When should I create a virtual, and when a regular user?
Check out the table below to find out when it's better to create a virtual and when it's better to create a regular user in ActiveCollab.
Bottom line
Virtual Users are an excellent feature you’ll only find in ActiveCollab. They’re great for onboarding and capacity planning. Easy to set up and free of charge, Virtual Users can be used to create accounts with Owner, Member, Member+, Client, and Client+ roles.
Once you’re ready to have new people join your ActiveCollab workspace, all you need to do is send them an invitation email, so they can log in and start collaborating with the rest of your team.
Ready to give it a try? Sign up for a free trial or book a demo to learn more about how ActiveCollab can help your business thrive.