Timeline view shows the tasks of a project as bars on a calendar, grouped by task list. You can change task dates and draw dependencies right on the chart.
Only tasks that have both a start date and a due date show on the timeline. Subtasks show as markers on their due dates. A task bar fills up as its subtasks are completed.
How to open the timeline
- Open the project and go to the Tasks tab.
- Click the view switcher.
- Select Timeline View.
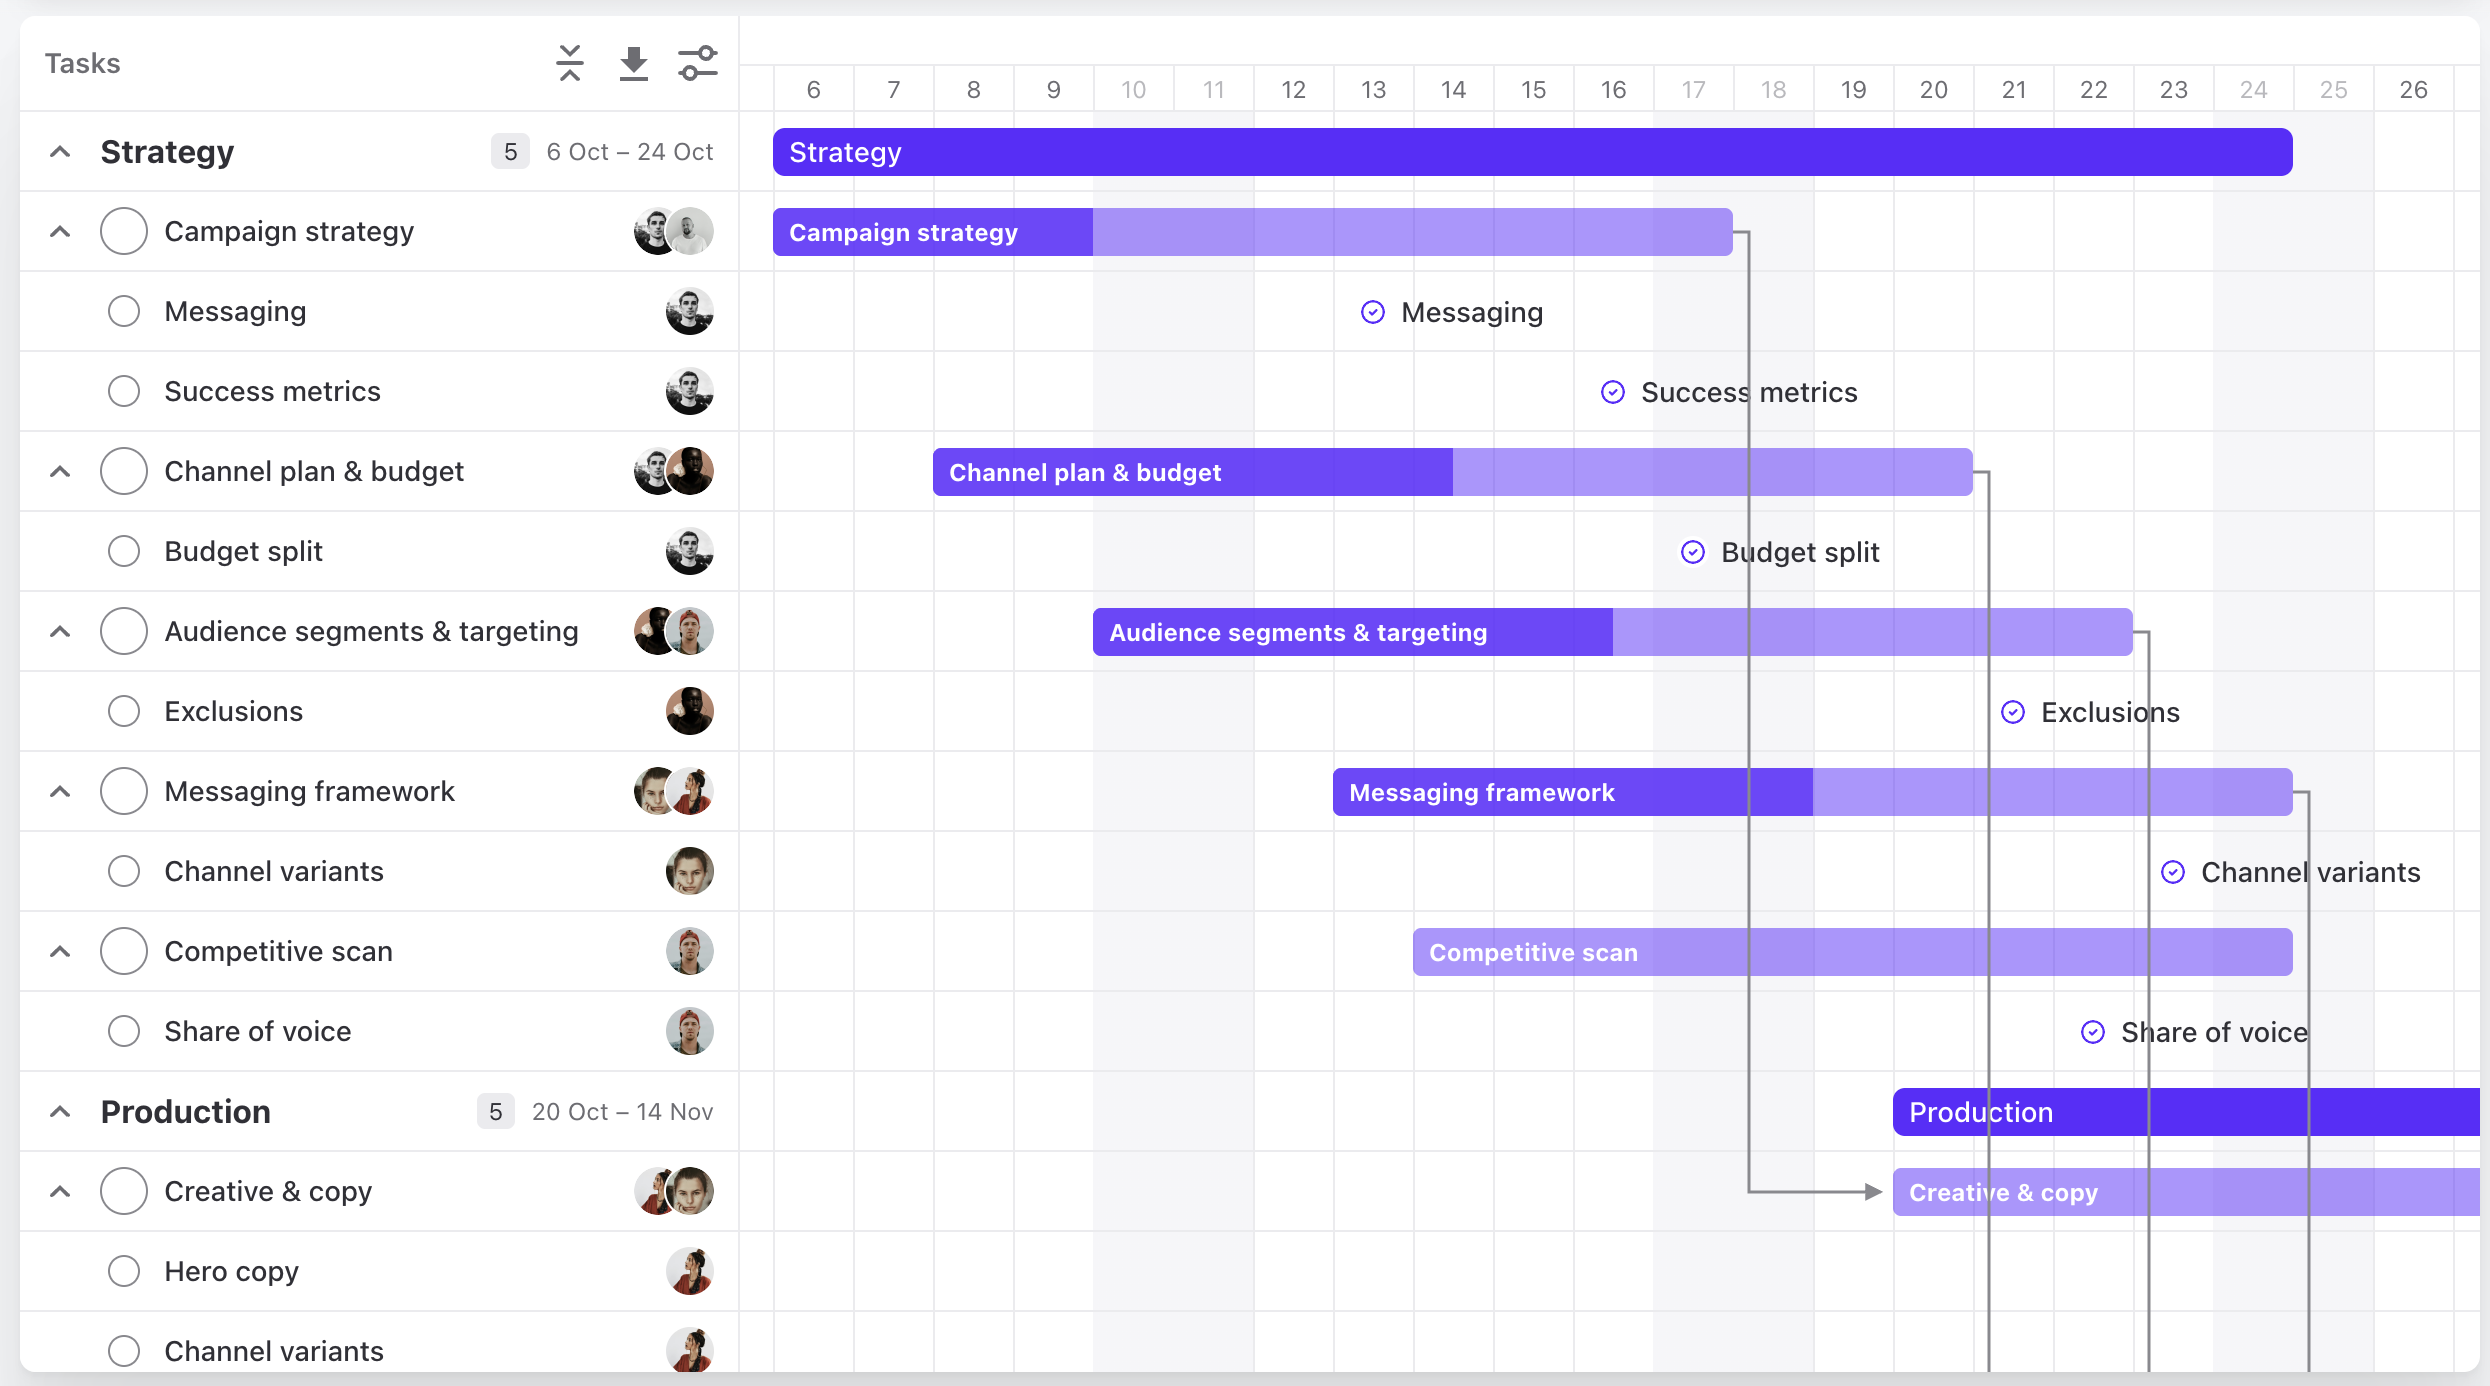
The timeline's Settings menu opens from the sliders icon above the task names. The download icon next to it opens the export.
How to zoom
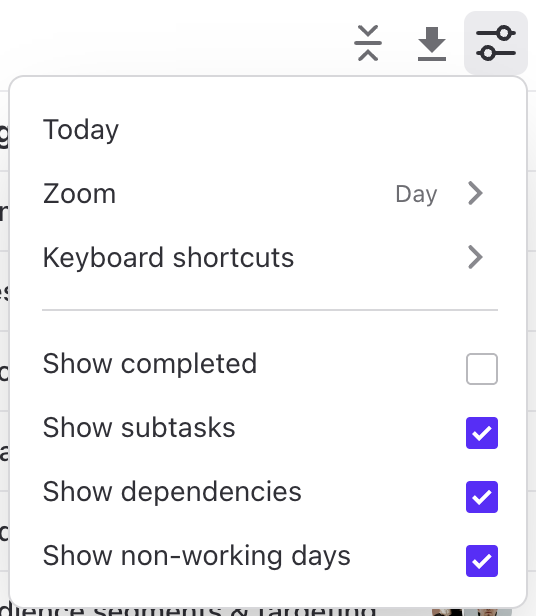
- Open the timeline's Settings menu.
- Select Zoom.
- Choose Day, Week, Month, Quarter, or Year. To see the whole project on one screen, choose Fit to screen.
You can also zoom with the mouse: hold Ctrl and turn the mouse wheel.
To go back to the current date, select Today in the Settings menu.
How to choose what the timeline shows
Open the Settings menu and turn these options on or off:
- Show completed: completed tasks.
- Show subtasks: subtask markers on their due dates.
- Show dependencies: the lines between predecessors and successors.
- Show non-working days: the days on which your team does not work.
How to change task dates on the timeline
Drag a task bar to move the task to new dates. To make the task longer or shorter, drag the edge of the bar instead.
The new dates are saved as soon as you drop the bar.
When the task has custom estimation splits and the new length would delete them, a Task Update dialog asks you to confirm. Click Continue to save the new dates, or Cancel to put the bar back where it was.
When Auto-Reschedule is turned on, the successors of the task move as soon as you drop the bar. When it is off, only the task you drag changes. See How to use Smart Rescheduling.
How to add and remove dependencies
You draw a dependency by dragging from the handle at the end of a task bar to another task bar. See How to Add a Task Dependency and How to Remove a Dependency.
Keyboard shortcuts
To see the shortcuts you can use on the timeline, open the Settings menu and select Keyboard shortcuts.
Export the timeline
To save the timeline as a file, click the download icon next to the Settings menu. See How to Export a Project Timeline.