Exporting Timeline
You can save the timeline of a project as a file, to share the plan with people outside ActiveCollab.
The export covers the whole project at the current zoom. When the project is too wide for one image at that zoom, you can zoom out to fit it, or keep the zoom and export a date range. You can also leave out tasks that are hidden from clients. For the steps and the file formats, see How to Export a Project Timeline.
To learn how to work with the timeline itself, see How To Use Timeline View.
How to Export a Project Timeline?
- Open the project and switch to Timeline View.
- Click the download icon next to the timeline's Settings menu. The Export Timeline dialog opens.
- Under Format, choose the file format.
- Under Outline width, choose Standard, Wider, or Widest. This sets how much room the task names get beside the chart.
- Under Include, select what the file shows: Completed tasks, Subtasks, Dependencies, and Non-working day shading.
- To leave out tasks that clients cannot see, select Exclude tasks hidden from clients. This also leaves out their subtasks and dependencies.
- If the dialog shows an Export width section, the whole project is too wide for one image at the current zoom. Choose one:
- Zoom out to fit (the default): the whole project in one image, at a smaller scale.
- Keep this zoom, export a date range: one image at the scale on screen. Pick the dates in the date picker.
- Click Export.
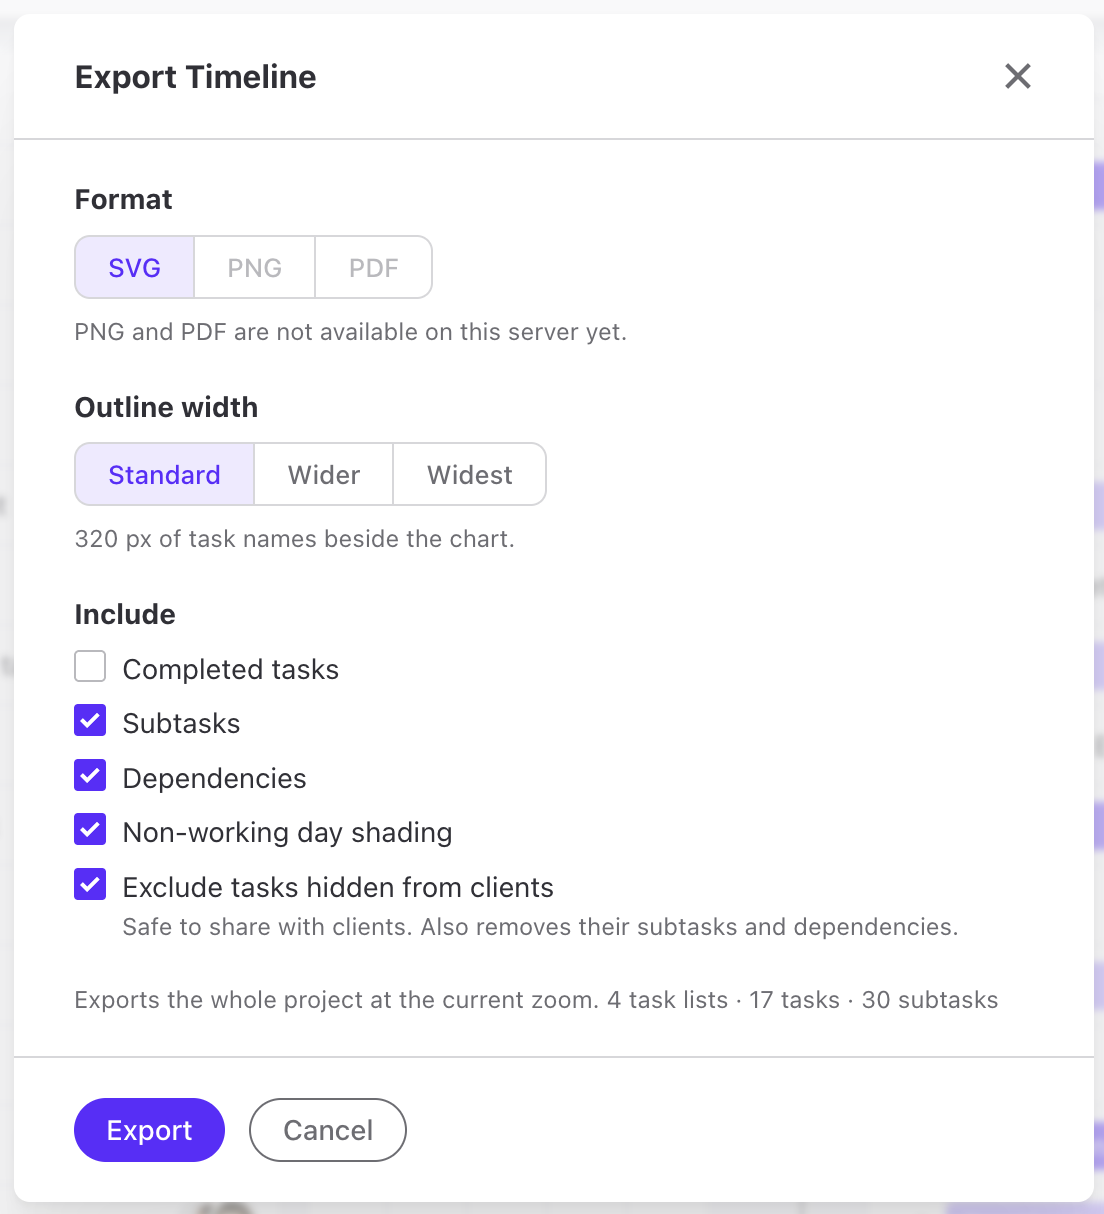
What the export covers
When the whole project fits in one image, the dialog has no Export width section, and the export shows the whole project at the current zoom.
When you export a date range, the caption under the date picker says how many days you can pick at this zoom. The limit is 366 days at most, and it is lower at wider zooms, because the image can be only so wide.
The line above the buttons tells you what the export covers: the whole project at the current zoom, or the dates you picked at the zoom on screen.
The export does not apply the filters you set on the timeline.
File formats
You can export the timeline as SVG. PNG and PDF are also available when your server supports them. The dialog lets you pick only the formats that your server supports. When PNG and PDF are not available, they are grayed out, and a note under Format says so.
How to Zoom in on the Project Timeline?
To zoom in, open the timeline's Settings menu (the sliders icon), select Zoom, and choose a shorter period, such as Week or Day. You can also hold Ctrl and turn the mouse wheel.
For all zoom options, see How To Use Timeline View.
When you export the whole project, the export uses the zoom level you set on the timeline.
How to Zoom out on the Project Timeline?
To zoom out, open the timeline's Settings menu (the sliders icon), select Zoom, and choose a longer period, such as Quarter or Year. To see the whole project on one screen, choose Fit to screen. You can also hold Ctrl and turn the mouse wheel.
For all zoom options, see How To Use Timeline View.
When you export the whole project, the export uses the zoom level you set on the timeline.