Workload Management
Save yourself days of planning and hours of meetings.
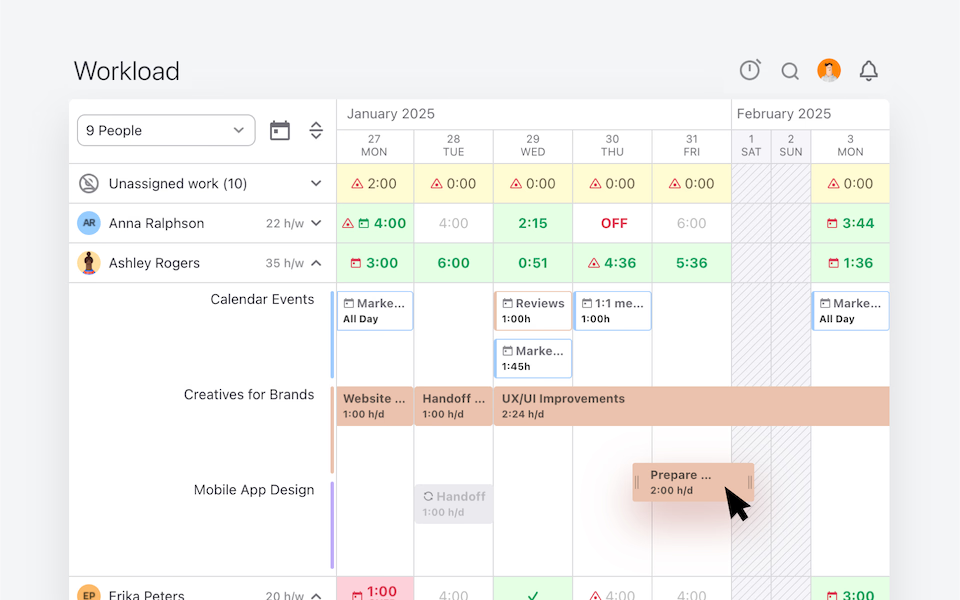
Workload view - a single overview of your team’s availability, projects, and tasks through time, capacity, and workload.
needed
Workload Management Software for Capacity Planning
Task management is easy with the Workload view in ActiveCollab.
Unassigned Task Management Across the Organization
Review unassigned tasks and subtasks, and decide who should be their owner based on the availability or resources.
See and Manage Individual and Team Capacity
Understand if any team member has a lot on their plate and balance the workload in a few clicks.
Understand Availability Through Time
The Workload view (a variation of the Gantt view) lets you see individual availability and days off.
Workload Optimization for Better Team and Individual Utilization
Balance out tasks and rearrange people working on specific assignments to improve productivity.
Asses Task Overload and Plan for Growth
Understand where your capacity is getting “thin” with the upcoming workload and plan for new hires.
"ActiveCollab helped in making the transition smooth when we were pushed toward home working and was one of the key factors in maintaining the quality of our work."
Interior Designer, Havelkadesign
"ActiveCollab sounded too good to be true. We went into our trial period with low expectations – to our surprise and delight, we were proven wrong."
Founder and Creative Director, JUICE Creative Group
"ActiveCollab allows our teams to ask questions, track and update statuses, report time, and communicate effectively and efficiently."
Director, Strategic Accounts, Xivic
"We've gotten way more efficient with our time management and communication, and a big part of that is because of ActiveCollab."
Founder and Managing Director, Rock Agency


Task Key Dates and Time Estimates
Add task start and due dates, as well as time estimates, and see it immediately reflected in the assignee’s workload for better capacity planning and workload management.
↳ See how Task and Project Tracking works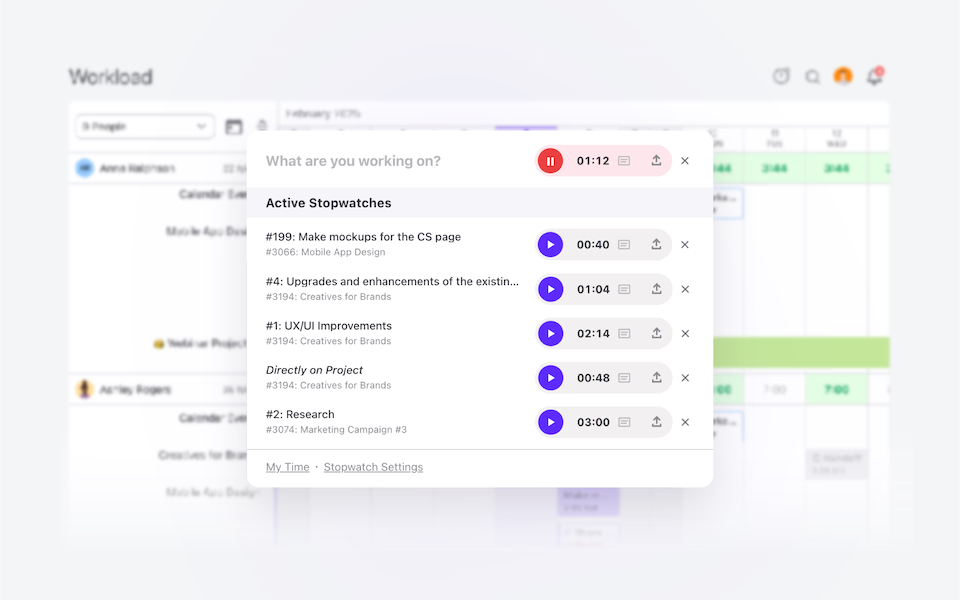
Time-Off Management
Manage your team’s time off directly in ActiveCollab—set different days off for team members, and see their availability across Projects, Tasks, Workload, and Capacity.
Project Management
The heart of your workspace is where your team and clients come together to turn ideas into reality. Create tasks, understand dependencies, see what you are working on, communicate and collaborate via chat, discussions, and notes.
↳ See how ActiveCollab Project Management works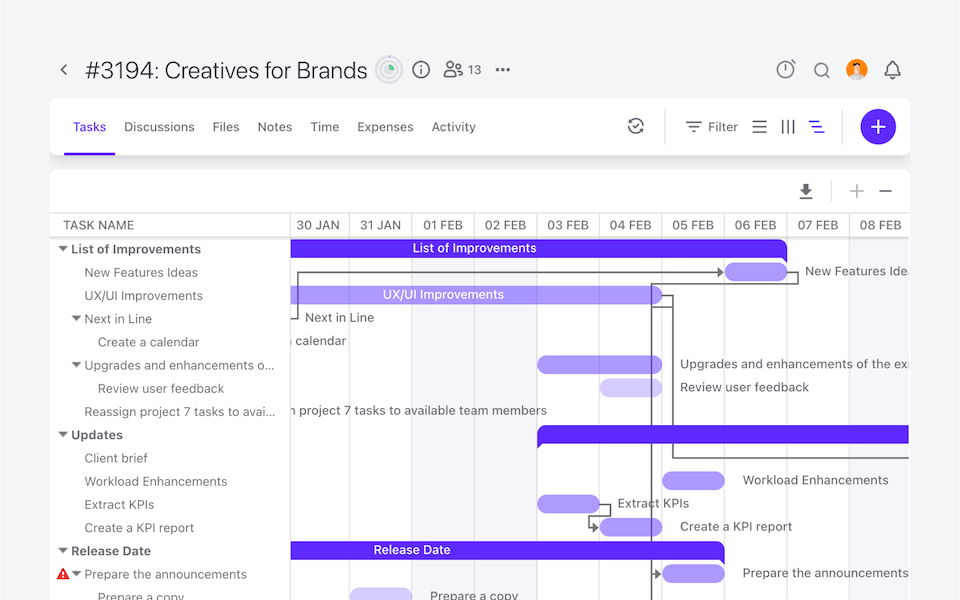
Success and Support
50K Teams
93%
Happiness Score
Help Center
Additional Onboarding Services
Engaged Community
Frequently
Asked
Questions
Here is more info to help you decide. Contact our Customer Success team if you have other questions.
ActiveCollab gives managers a clear overview of everyone’s assignments, making it easier to balance work across the team. Instead of relying on guesswork, you can see who has too much on their plate and who has room for more.
With just a few clicks, tasks can be reassigned to even things out. This not only keeps projects moving but also boosts morale, because a fair workload means fewer bottlenecks, less burnout, and a team that performs at its best!
Yes, and that visibility is one of the biggest advantages of workload management in ActiveCollab!
The tool highlights when someone’s at risk of being overwhelmed and when others have available capacity. That insight lets you shift tasks before issues escalate, making sure no one gets buried under work while others sit idle. It’s a straightforward way to keep projects balanced and your team engaged!
The result? A healthier, more productive work environment!
Absolutely! ActiveCollab updates workload views in real time, so managers always know where things stand. As new tasks are assigned or progress is logged, the workload chart reflects those changes instantly.
This makes it easy to spot risks early and adjust before deadlines are jeopardized. For teams, it means fewer surprises and better alignment. For managers, it’s the confidence of knowing decisions are always based on the most accurate, up-to-date picture of the team’s workload.
Yes! ActiveCollab’s workload management software lets you plan across multiple projects without losing sight of priorities.
You can see overlapping tasks, spot who’s overbooked, and rebalance assignments in seconds. For agencies managing several clients at once, this view makes all the difference.
Instead of siloed planning, you get a connected picture of your team’s commitments. It helps you set realistic deadlines, improve coordination, and keep projects moving smoothly – no matter how many are running at the same time!
Absolutely! With workload management software in ActiveCollab, you don’t just assign tasks – you monitor progress against workload in real time. When someone falls behind, the system makes it visible early, so managers can act before deadlines slip. You can shift tasks, adjust priorities, or extend timelines when needed.
This proactive approach reduces stress, improves delivery, and keeps teams working at a sustainable pace while maintaining client expectations!
Yes! ActiveCollab’s workload management software includes reporting features that show exactly how effort is distributed across your team.
You’ll know who’s at capacity, who has room to take on more, and where resources are being used most effectively. These insights help you identify patterns, improve efficiency, and make smarter staffing decisions.
Reports also give managers a data-backed way to show progress and balance, which helps build trust with both teams and clients!