My Work
The My Work section provides a personalized overview of your responsibilities, tasks, time tracking, and activity. It acts as your central dashboard for managing daily operations efficiently.
What You’ll Find in My Work
The My Work section consists of the following parts:
- Tasks – A grouped view of all tasks assigned to you.
- Timesheet – A weekly record of time you’ve tracked or logged.
- Activity – A timeline of your recent actions and updates.
- Availability – Your planned availability for future work.
How can I create new records from My Work?
You can create new records at any time directly from the My Work section:
- Step 1: Go to the “My Work” section
- Step 2: Click on the + button in the top right corner
- Step 3: Choose one of the following records:
- New Task – Add a new task to a specific project.
- New Time Record – Log time manually for work already completed.
- New Availability Record – Indicate your available or unavailable days for scheduling.
- These quick-access options streamline your workflow and reduce the need to navigate through multiple menus.
- Video Tutorial : https://vimeo.com/1122248854
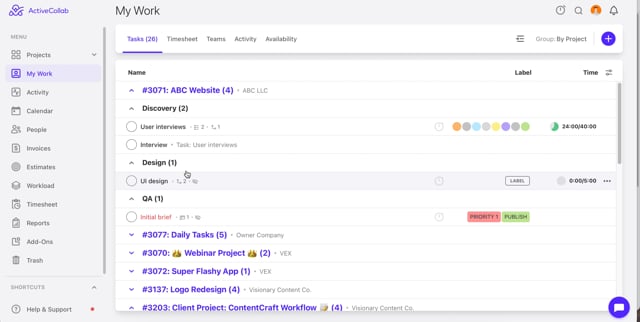
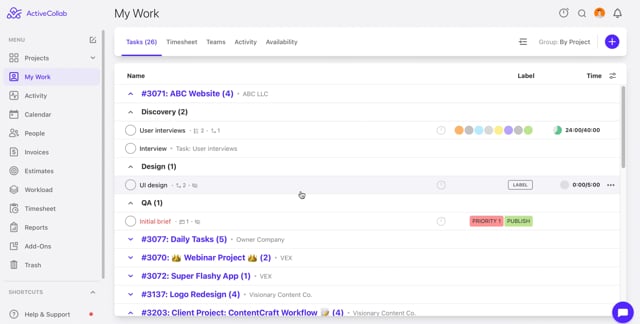
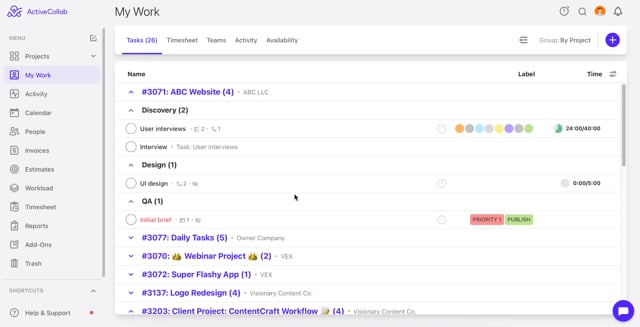
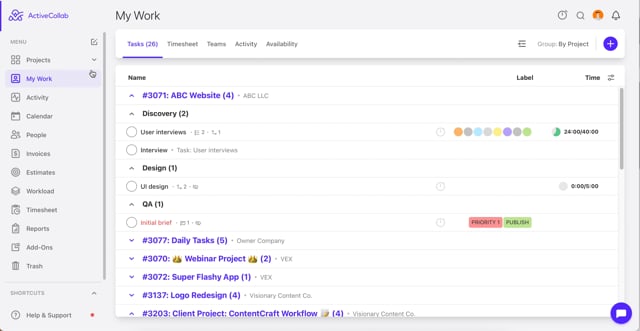
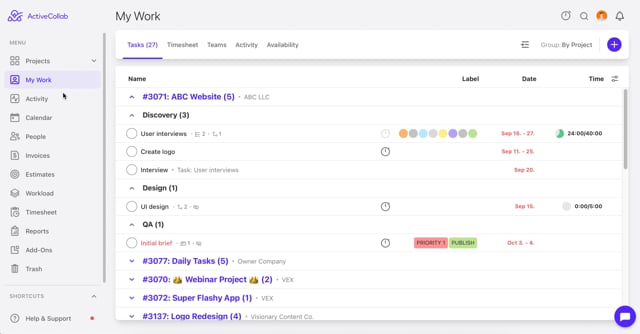
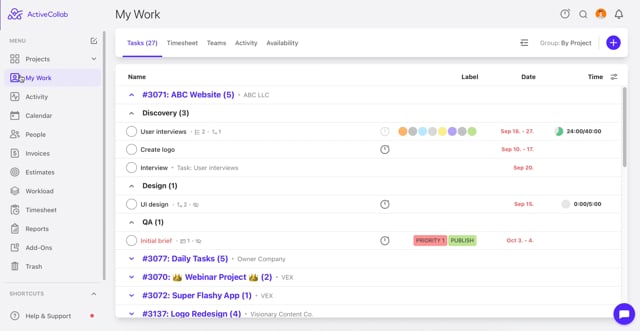
Tasks
The Tasks tab within the My Work section is your personalized command center, showing all tasks assigned to you across all projects. It allows you to track deadlines, organize work, log time, and manage tasks efficiently from a single view.
How to access "Tasks" within the “My Work” section?
- Step 1: Log in to your ActiveCollab workspace.
- Step 2: In the sidebar, click on My Work.
- Step 3: At the top, select the Tasks tab.
- Video Tutorial : https://vimeo.com/1122249514
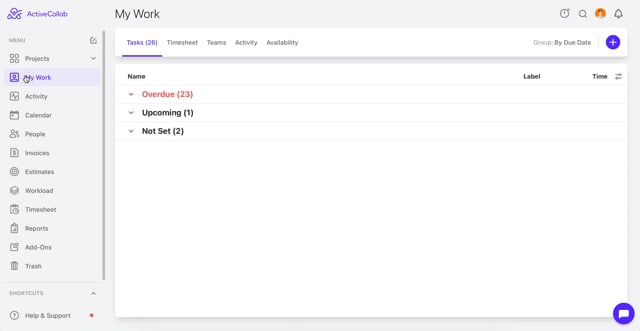
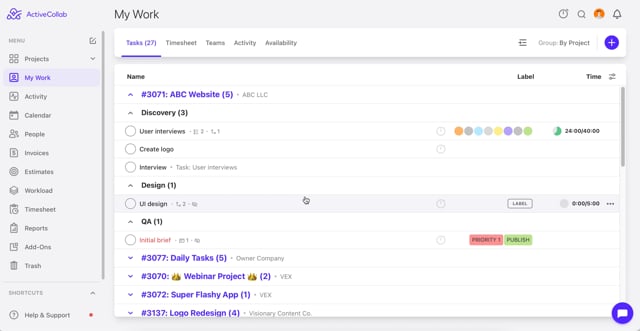
How to group tasks in the “Tasks” tab within the “My Work” section?
You can group tasks in three different ways using the dropdown at the top right side of the page.
- How to group tasks by start date in the “Task” tab within the “My Work” section?
- Step 1: In the sidebar, click on My Work.
- Step 2: At the top, select the Tasks tab.
- Step 3: In the top right side of the page, using the drop-down menu, choose the “By Start Date” option
- Note - The tasks will be grouped in the following way:
- Today – Tasks starting today.
- Upcoming – Future tasks not yet started.
- Overdue – Tasks that should have started already.
- Started – Tasks that have already been started but are not yet complete.
- Video Tutorial: https://vimeo.com/1122250462
2. How to group tasks by due date in the “Task” tab within the “My Work” section?
- Step 1: In the sidebar, click on My Work.
- Step 2: At the top, select the Tasks tab.
- Step 3: In the top right side of the page, using the drop-down menu, choose the “By Due Date” option
- Note - The tasks will be grouped in the following way:
- Today – Tasks due today.
- Upcoming – Tasks due soon (within a few days).
- Overdue – Tasks past their due date.
- Next Week – Tasks due in the following calendar week.
- Video Tutorial : https://vimeo.com/1122250954
3. How to group tasks by Project in the “Task” tab within the “My Work” section?
- Step 1: In the sidebar, click on My Work.
- Step 2: At the top, select the Tasks tab.
- Step 3: In the top right side of the page, using the drop-down menu, choose the “By Project” option
- Note - Tasks are shown under their assigned project. Each project groups tasks by Task List, providing a structured view of task organization within that project. The Projects can be sorted using the Drag&Drop option.
- Video Tutorial : https://vimeo.com/1122251616
How to manage your tasks in the “Tasks” tab within the “My Work” section?
You can manage most task details directly from this page:
How to mark the task as Complete within the “My Work” section?
- Step 1: In the sidebar, click on My Work.
- Step 2: At the top, select the Tasks tab.
- Step 3: Use the checkbox next to each task to mark it done.
- Video Tutorial : https://vimeo.com/1122252493
How to open Task Details within the “My Work” section?
- Step 1: In the sidebar, click on My Work.
- Step 2: At the top, select the Tasks tab.
- Step 3: Click on the task name to open the full view (comments, attachments, etc.).
- Video Tutorial : https://vimeo.com/1122252971
How to add Labels within the “My Work” section?
- Step 1: In the sidebar, click on My Work.
- Step 2: At the top, select the Tasks tab.
- Step 3: Click on “LABEL”
- Step 4: Assign task labels directly from the list to help categorize tasks (e.g., priority, type, department).
- Video Tutorial : https://vimeo.com/1122253419
How to edit Dates within the “My Work” section?
- Step 1: In the sidebar, click on My Work.
- Step 2: At the top, select the Tasks tab.
- Step 3: Click the start or due date on any task to update deadlines inline.
- Video Tutorial : https://vimeo.com/1122254403
How to track Time within the “My Work” section?

- Step 1: In the sidebar, click on My Work.
- Step 2: At the top, select the Tasks tab.
- Step 3: Click the stopwatch icon beside a task to start or stop the timer. This logs time to that specific task.
- Video Tutorial : https://vimeo.com/1122255213
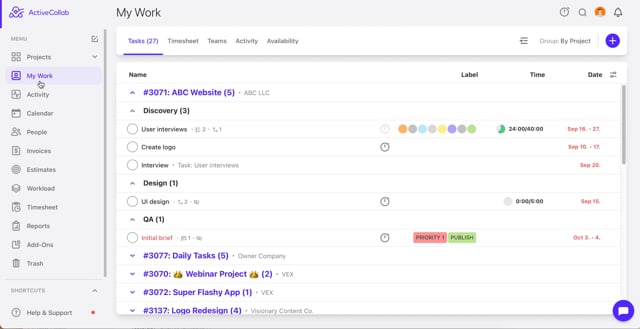
How to edit columns in the “Task” tab within the “My Work” section?
- Step 1: In the sidebar, click on My Work.
- Step 2: At the top, select the Tasks tab.
- Step 3: Click on the Settings icon in the top-right corner of the Tasks view to customize your interface.
- Step 4: Enable or reorder the following columns:
- Label – Displays any assigned task labels.
- Date – Shows either start or due date depending on grouping.
- Time – Displays tracked time logged on the task.
- Video Tutorial : https://vimeo.com/1122257380
How to toggle Task Signifiers in the “Task” tab within the “My Work” section?
- Step 1: In the sidebar, click on My Work.
- Step 2: At the top, select the Tasks tab.
- Step 3: Click on the Settings icon in the top-right corner of the Tasks view to customize your interface.
- Step 4: Turn on or off small icons that indicate the presence of:
- Comments
- Dependencies
- Subtasks
- Visibility to Client
- Recurring Task
- Note - These visual cues help you quickly understand what each task includes without needing to open it.
- Video Tutorial : https://vimeo.com/1122257936
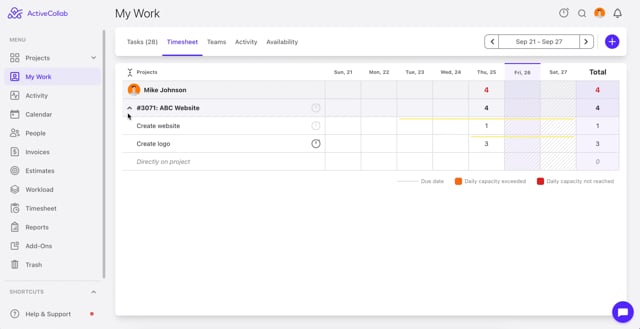
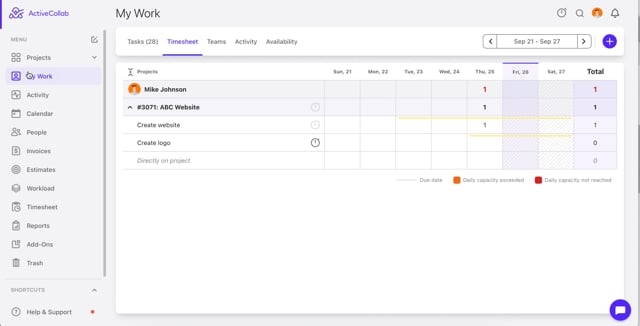
Timesheet
The Timesheet tab offers a clear weekly overview of all the time you’ve tracked, grouped by day and task. It helps you monitor your logged hours, identify gaps, and ensure accurate reporting.
How to use the “Timesheet” within the “My Work” section for Weekly Overview?
The Timesheet is organized in a 7-day calendar format.
Each day displays a visual breakdown of time logged.
Time entries are grouped by task and aligned with the corresponding day of the week.
What do the colors in the “Timesheet” tab within the “My Work” section indicate?
Each time block is color-coded to help quickly assess your daily activity:
- 🔴 Red Numbers – Indicate that the daily capacity was not reached.
- 🟠 Orange Numbers – Indicate that the daily capacity was exceeded.
Those color indicators will help you allocate your time evenly.
What does hovering over logged time in the “Timesheet” tab within the “My Work” section show?
Hovering your cursor over any colored bar or line will reveal a tooltip showing:
- Step 1: In the sidebar, click on My Work.
- Step 2: At the top, select the Timesheet tab.
- Step 3: Hover over the The task start and due date.
- Video tutorial: https://vimeo.com/1122258690
This feature allows you to quickly review what you worked on without navigating away from the overview.
How can I add Time in the “Timesheet” tab within the “My Work” section?

- Step 1: In the sidebar, click on My Work.
- Step 2: At the top, select the Timesheet tab.
- Step 3: Click on any day’s column to add a new time entry.
- Step 4: Click on the stopwatch next to the task to start tracking time.
- Note: Use the navigation arrows at the top to switch between weeks.
- Video Tutorial: https://vimeo.com/1038538490
How can I edit or delete the logged Time in the “Timesheet” tab within the “My Work” section?
- Step 1: In the sidebar, click on My Work.
- Step 2: At the top, select the Timesheet tab.
- Step 3: Click on any day’s logged time
- Step 4: Click on the logged time in the bottom right corner of the pop-up menu
- Step 5: You’ll get the option to delete by clicking on the trash icon, or edit the following information on the time that’s already logged:
- Logged time
- User
- Status of the time record (Billable, Not Billable, Paid, Pending Payment)
- Date
- Activity
- Video Tutorial: https://vimeo.com/1122807669
The Activity tab provides a detailed log of your recent actions across all projects. It’s designed to help you review your own contributions, track work progression, and identify any missed updates.
What “Activity” in the “My Work” tab shows?
The activity feed displays a chronological list of your actions, including:
- Tasks and subtasks you’ve completed
- Comments you’ve posted
- Time records you’ve added
- Files you’ve uploaded
- Changes to due dates or assignments
- Updates to task status (marked as important)
- Each activity entry includes:
- The type of action (e.g., comment, completion, edit)
- A timestamp (date and time)
- The name of the task or project it was related to
- A brief summary or preview of the change (e.g., the comment text, updated date)
How to navigate & filter my activity in the “Activity” tab within the “My Work” section?

- Step 1: In the sidebar, click on My Work.
- Step 2: At the top, select the Activity tab.
- Step 3: Use the scrollable feed to browse through your history.
- Step 4: At the top, use filters in the drop down menu to limit the feed to:
- Daily views
- Weekly views
- Monthly views
- Note: Entries are grouped by day, with the most recent activity appearing first.
- Video Tutorial: https://vimeo.com/1122808179
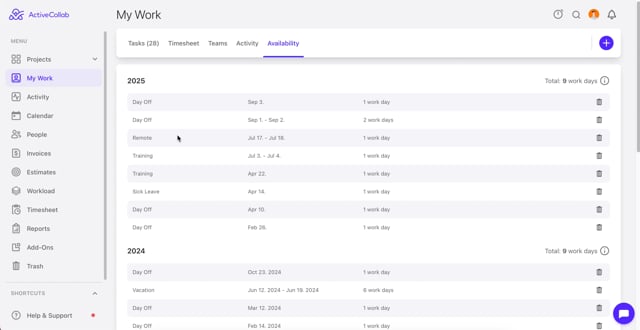
Availability
The Availability tab helps you define and share your working schedule. It allows you to declare time off and ensures project managers have full visibility of your capacity.
How to add or edit my availability in the “Availability” tab within the “My Work” section?
- Step 1: In the sidebar, click on My Work.
- Step 2: At the top, select the Availability tab.
- Step 3: Click the “+ Add Availability Record” button in the top-right corner.
- Step 4: A form will appear where you can input the following:
- Start Date and End Date – For a single day or a date range.
- Availability Type - You can create availability types in the system settings.
- Note (optional) – Add context such as “Half-day for appointments” or “Vacation” that will be seen only by users receiving the availability notification.
- Step 5: Click Save to confirm the record.
- Video Tutorial: https://vimeo.com/1122809604
All entries will be displayed in a list format beneath the availability form.
How to delete my availability records in the “Availability” tab within the “My Work” section?
- Step 1: In the sidebar, click on My Work.
- Step 2: At the top, select the Availability tab.
- Step 3: Delete a record using the trash icon.
- Video Tutorial : https://vimeo.com/1122810558
How to check my yearly Availability summary in the “Availability” tab within the “My Work” section?

On the Availability page, you'll find a yearly summary that aggregates your availability records:
- Displays the total number of days logged by type for the year in question.
- Each category shows the exact number of days logged under that type.
- Video Tutorial: https://vimeo.com/1122810994
Note: This summary provides a high-level view of how your availability is distributed across the year, useful for planning time off, reviewing capacity trends, and reporting purposes.