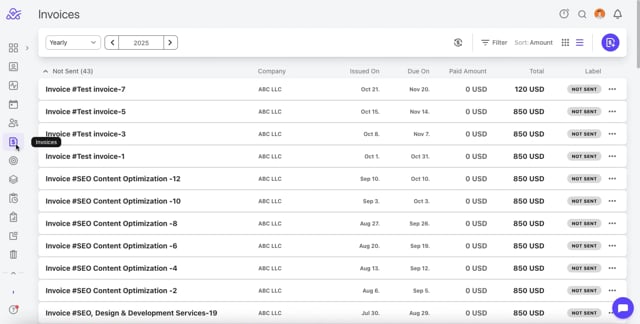
In ActiveCollab, sending invoices to clients is quick and easy. You can create them manually or based on tracked time and expenses.
Only Owner users and Members with access to invoices and estimates can create and issue invoices.
Use invoicing in ActiveCollab when you need to:
- Bill clients for tracked time and expenses
- Send invoices for flat-fee projects
- Keep financial records in sync with your projects
Note:
Invoices can only be seen if the Get Paid addon is active.
If the addon is deactivated, invoices will not be visible, but they will not be deleted.
If you reactivate the Get Paid addon in the future, you will regain access to all invoices created in the past.
How to create invoices
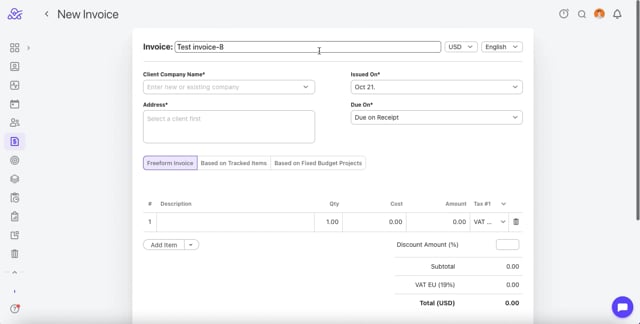
- STEP 1: Open Invoices,
- STEP 2: Click +New Invoice,
- STEP 3: Select a client company or enter a new one,
- STEP 4: Enter the address and choose a currency and a language in which you wish to issue the invoice.
- STEP 5: Enter the invoice ID, which will be generated automatically for all subsequent invoices (see below),
- STEP 6: Set the issue date and the due date,
- STEP 7: Choose how you wish to add invoice items:
- Free-form invoice - add items, costs, and quantity manually.
- Invoice based on tracked time and expenses in projects - select projects, the time period, and how to group invoice items,
- Invoice for Fixed-price budgets,
- STEP 8:
- Add items manually or from a template,
- Add a tax where applicable. Change the tax rate on all the items at once by clicking the Tax column and choosing a tax rate from the list.
- Add a discount (optional),
- STEP 9:
- Add a Note for the client or a private comment/reference (optional),
- Add QR code (optional)
- STEP 10:
- Click Create Invoice.
After creating an invoice, you’ll be able to preview and edit the draft. - Video tutorial: https://vimeo.com/1129171896
How to generate an invoice ID
ActiveCollab can create invoice IDs automatically, based on the invoice number you set for the first invoice. Here are a few examples:
0001, 0002, 0003, ...
1/2016, 2/2016, 3/2016, ...
1-2016, 2-2016,3-2016, ...
2016/12-1, 2016/12-2, 2016/12-3, ...
INV-2016-01, INV-2016-02, INV-2016-03, …
Note: Only dash (-) and slash (/) are recognized as separators, but not dot (.)
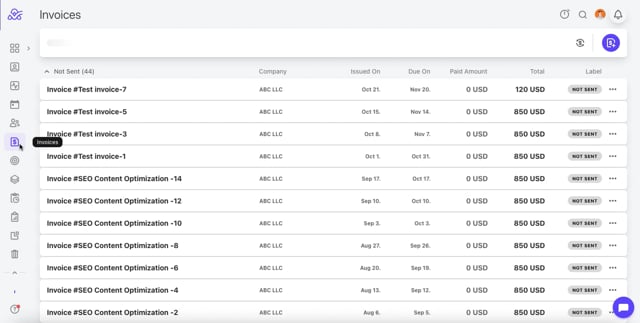
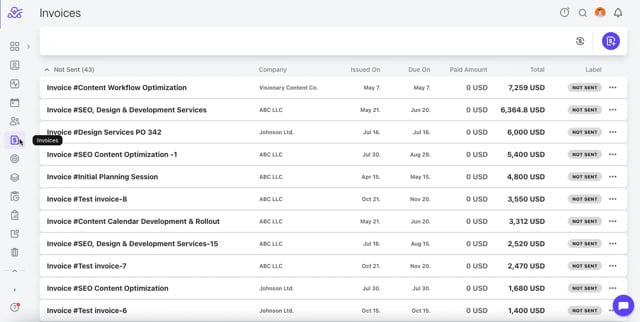
How to send invoices
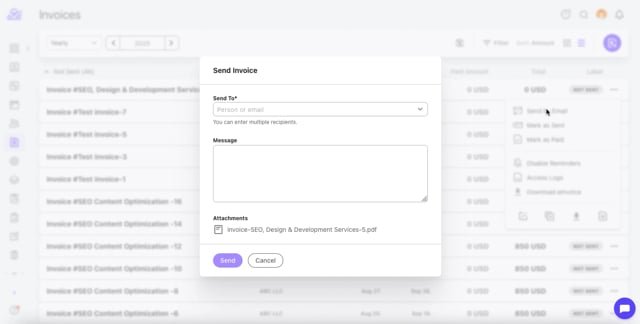
- STEP 1: From the main left menu, click on Invoices
- STEP 2: Open an unsent invoice and click on the three dots (...)
- STEP 3: Click Send by Email
- STEP 4: Enter one or more recipients
- STEP 5: Enter the email message
- STEP 6: Click Send Invoice
- Video tutorial: https://vimeo.com/1129172434
Note: When you send the invoice, your client will receive an email with the invoice PDF as an attachment.
How to mark an invoice as sent

- STEP 1: From the main left menu, click on Invoices
- STEP 2: Open an unsent invoice and click on the three dots (...)
- STEP 3: Click Mark as sent
- STEP 4: Confirm your choice
- Video tutorial: https://vimeo.com/1129172841
Note: The client will not be notified about this change.
How to mark payments
If you enabled online payments, you’ll be notified when the client makes the payment. You can also manually mark an invoice as paid:
- STEP 1: From the main left menu, click on Invoices
- STEP 2: Open an invoice and click on the three dots (...)
- STEP 3: Click Mark payment
- STEP 4: Enter the amount and payment date
- STEP 5: Click Save Payment.
- Video tutorial: https://vimeo.com/1129173342
The invoice will then appear under Paid or Partially paid, depending on whether a full or partial payment has been made.
Note: When the invoice is partially paid, you can choose the option:
Notify the client about this payment.
How to disable reminders

- STEP 1: From the main left menu, click on Invoices
- STEP 2: Open an invoice and click on the three dots (...)
- STEP 3: Click on Disable reminders
- STEP 4: Confirm on Disable
- Video tutorial: https://vimeo.com/1129173741
Note: Reminders won’t be sent to the client when this invoice is overdue.
How to access logs
- STEP 1: From the main left menu, click on Invoices
- STEP 2: Open an invoice and click on the three dots (...)
- STEP 3: Click on Access logs
- Video tutorial: https://vimeo.com/1129174200
How to edit an invoice

- STEP 1: From the main left menu, click on Invoices
- STEP 2: Open an invoice and click on the three dots (...)
- STEP 3: Click on Edit
- STEP 4: Enter the changes and click Save
- Video tutorial: https://vimeo.com/1129175952
How to duplicate an invoice
- STEP 1: From the main left menu, click on Invoices
- STEP 2: Open an invoice and click on the three dots (...)
- STEP 3: Click on Duplicate
- STEP 4: Enter the changes and click Save
- Video tutorial: https://vimeo.com/1129176423
How to cancel an invoice
- STEP 1: From the main left menu, click on Invoices
- STEP 2: Open an invoice and click on the three dots (...)
- STEP 3: Click on Cancel
- STEP 4: Confirm Yes to cancel the invoice.
- Video tutorial: https://vimeo.com/1129178487
Note: Canceling will archive the invoice.
How to completely Delete an Invoice?
- STEP 1: From the main left menu, click on Invoices
- STEP 2: Click on the three dots (...) next to the Invoice you wish to delete.
- STEP 3: Click on Cancel
- STEP 4: Confirm on Yes to cancel invoice
- STEP 5: Scroll to the bottom of the Invoice tab and find the canceled invoice.
- Hint: You can use the Filter and filter by Status - Canceled.
- STEP 6: Click on the three dots (...) next to the invoice you’ve just canceled.
- STEP 7: Click on the Trash icon
- STEP 8: Click on Delete.
- STEP 9: Click on the Trash tab on the left side, in the Navigational menu.
- STEP 10: Find the invoice you’ve just deleted.
- STEP 11: Click on the Trash icon next to it.
- STEP 12: Click on “Delete” to confirm the deletion. This will also free up the Invoice number for future use.
- Video tutorial: https://vimeo.com/1129177637
How to download the PDF to preview the invoice
- STEP 1: From the main left menu, click on Invoices
- STEP 2: Open an invoice and click on the three dots (...)
- STEP 3: Click on Download PDF
- Video tutorial: https://vimeo.com/1129177016
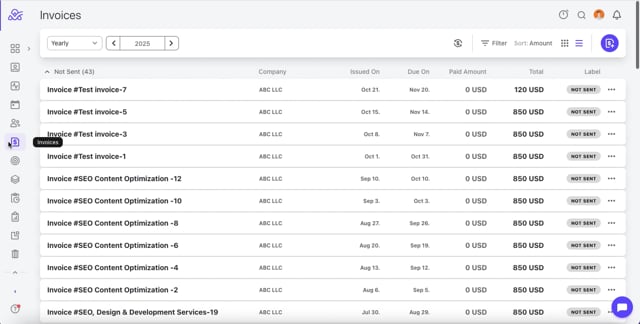
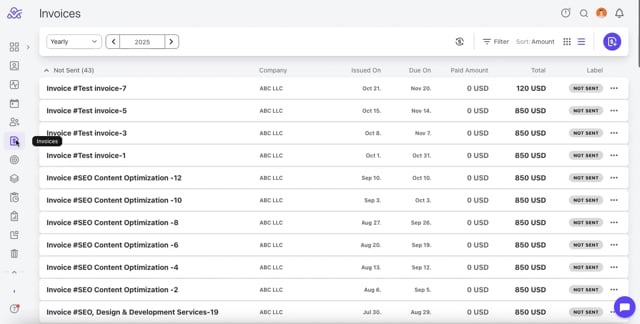
How to filter invoices
- STEP 1: From the main left menu, click on Invoices
- STEP 2: Click on the Filter button next to the Sort button
- STEP 3: Proceed to filter by:
- - Status
- Client
- Due date
- Currency - STEP 4: Select the desired filter.
- STEP 5 (optional): you can remove the filter by clicking on the "x" next to the "Filter"
- Video tutorial: https://vimeo.com/1129178948
How to sort invoices
- STEP 1: From the main left menu, click on Invoices
- STEP 2: Click on the Sort button next to the Filter button
- STEP 3: Proceed to filter by:
- Issued on
- Due on
- Activity
- Amount
- STEP 4: Select the desired sorting parameter.
- Video tutorial: https://vimeo.com/1129179445
How to use QR CODE
You can include a QR code in your invoices.
Set it up to be the payment link or a custom note of your choice.
Once scanned, it will take the user directly to the payment page. If you pick the custom note, you can enter any link you'd like the QR code to lead to.
- STEP 1: From the main left menu, click on Invoices
- STEP 2: Create a new invoice or edit an existing one
- STEP 3: Scroll down at the bottom of the invoice to Add QR Code
- STEP 4: Click Save
- Video tutorial: https://vimeo.com/1129179921
E-Invoice
Electronic invoicing or e-invoicing, is the process of sending and receiving
electronic invoices between a buyer and seller in a special, structured data format.
Accepted e-invoicing formats may differ from region to region however, the most common ones globally include:
XML-based formats
PEPPOL
JSON
Note: All e-invoices can be processed automatically.
How to turn on e-invoice
- STEP 1: Click on your My Profile picture in the upper right corner.
STEP 2: Click on System settings - STEP 3: Access Invoice and Estimates settings
- STEP 4: Click Turn on E-invoices
- STEP 5: Click Save
- Step 6 (optional): Send E-invoice to Clients - When enabled, eInvoice will be included in email notifications that are sent to clients.
- Video tutorial: https://vimeo.com/1129180634
How to download e-invoice
- STEP 1: From the main left menu, click on Invoices
- STEP 2: Click the 3 dots in the upper right corner of an invoice
- STEP 3: Click Download Invoice
- Video tutorial: https://vimeo.com/1129181111
How to create an invoice from an estimate
- STEP 1: From the main left menu, click on Estimates
- STEP 2: Select a desired estimate from the List/Grid view and click on the three dots in the upper right corner
- STEP 3: Click Create Invoice.
- STEP 4: Fill in the required invoice information.
STEP 5: Click on "Create Invoice" - Video tutorial: https://vimeo.com/1129492996
How to customize the appearance of an Invoice
- STEP 1: Log in to your ActiveCollab account.
- STEP 2: In the upper right corner, next to the Search button, click on the My Profile button
- STEP 3: Select System settings from the dropdown menu
- STEP 4: From the dropdown menu, select Invoice and Estimate
- STEP 5: From the dropdown menu, select Invoice Designer
- STEP 6: You will be able to adjust the following:
- Items
- invoice label
- Paper size (A4 / Letter)
- Company details
- Company logo ( JPGs or PNGs - up to 3MB. Dimensions 80x80px)
- Company name
- Company address and details ( Note- Address format is defined in General Settings )
- Header
- Show border between header and body of the invoice
- Logo Position ( left/right aligned)
- Client Details Position ( left/right aligned)
- Footer
- Print Footer
- Show border between footer and body
- Footer Item Position ( paper number on the left/ invoice number on the left)
- Video tutorial: https://vimeo.com/1129493447
How to Use the Invoices Tab within the Client Company section in ActiveCollab?
How to View Invoices?
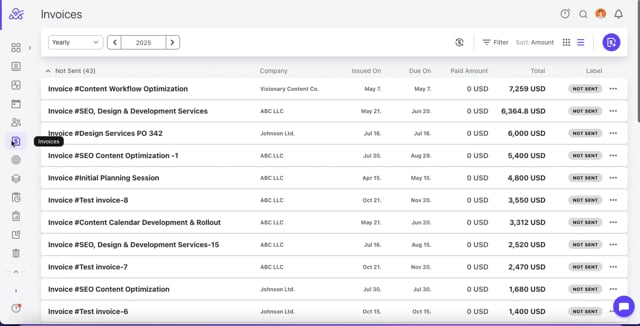
In this tab, you'll see a list of all invoices tied to the client. For each invoice, you'll see:- Invoice number
- Issue date
- Due date
- Status (draft, sent, paid, overdue, etc.)
- Total amount
How to Create a New Invoice from the Client Company section?
- Step 1: Click the + New Invoice button.
- Step 2: Add line items: tasks, services, or custom entries with rates, quantities, and taxes.
- Step 3: Define the due date, payment terms, and currency.
- Step 4: Set the invoice status (e.g. draft or sent).
- Step 5: Save or preview the invoice.
- Video tutorial: https://vimeo.com/1129493795
How to Send an Invoice from the the Client Company section?
- Step 1: Click Send to email the invoice directly to the client.
- Step 2: Customize the subject and message if needed before sending.
- A PDF version of the invoice will be attached to the email.
- Video tutorial: https://vimeo.com/1129494215
How to Edit or Manage an Invoice from the the Client Company section?
Step 1: Click the three-dot menu (⋮) next to an invoice in the list for quick actions:
- Send by Email
- Mark as sent
- Mark Payment
- Disable reminders
- Access logs
- Download PDF – Download a copy of the invoice.
- Print – Open a print-friendly version of the invoice.
- Duplicate – Create a new invoice using the same content.
- Delete – Permanently remove the invoice.
- Video tutorial: https://vimeo.com/1129494645
How to Record Payments from the Client Company section?
- Step 1: Open the invoice and click Add Payment to log a manual payment.
- Step 2: Enter payment amount, method, and date.
- Step 3: Once the full amount is paid, the invoice status will automatically change to Paid.
- Video tutorial: https://vimeo.com/1129495104
How to send overdue Invoices from the the Client Company section?
- Step 1: Locate the “Overdue” summary box
- Step 2: At the top of the page, you’ll see four financial summary boxes: Draft, Sent, Paid, and Overdue. Look for the Overdue box.
- Step3 : Click the bell icon in the Overdue box
- If there are any overdue invoices, you’ll see a bell icon inside the Overdue box.
- Step 4: Click the bell icon to send reminders for all overdue invoices for that client.
- Step 5: A confirmation message will appear in the top-right corner, letting you know the reminders were successfully sent. This method sends reminders for all overdue invoices related to that client in one click.
- Video tutorial: https://vimeo.com/1129495775
FAQ – Invoices & Get Paid Addon
Q: Why can’t I see my invoices?
A: Invoices are only visible when the Get Paid addon is active. If the addon is turned off, invoices are temporarily hidden.
Q: Are my invoices deleted if I disable the Get Paid addon?
A: No. Your invoices are not deleted. They simply become hidden while the addon is disabled.
Q: What happens if I reactivate the Get Paid addon?
A: Once you reactivate the Get Paid addon, all your previously created invoices will become visible and accessible again.
Q: Can I still access invoicing features without the addon?
A: No. All invoicing features, including invoice visibility, require the Get Paid addon to be active.