Time Report
The Time Report shows how much time has been tracked across all projects and lets you filter out results in various ways. All the tasks and projects in the report are clickable.
Who can see the Time Report?
This report is available to Owner and Member+ users with the option to start projects, manage people and use reports.
How can I access the Time Report?
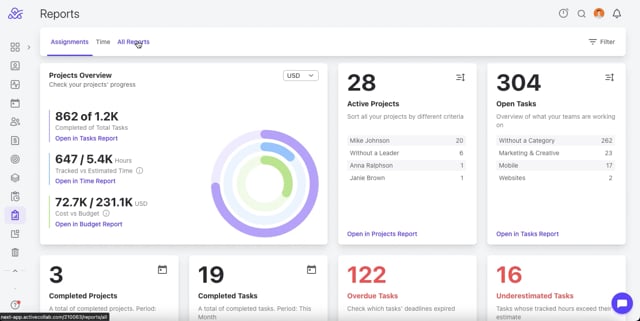
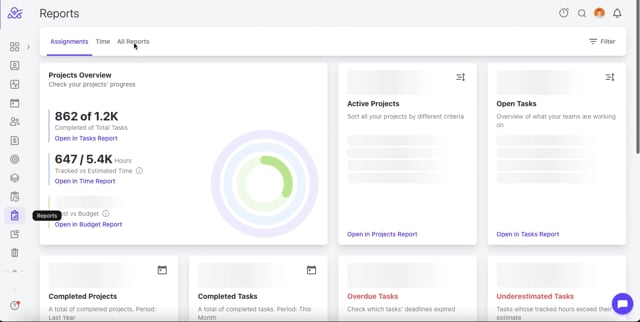
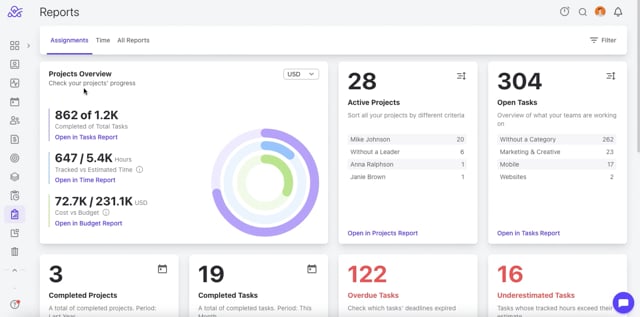
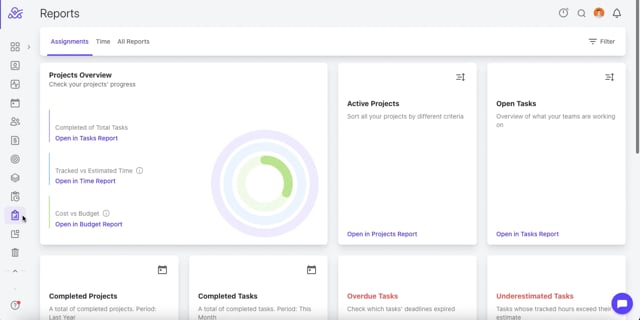
- Step 1: Click on Reports
- Step 2: Click on All Reports
- Step 3: Click New Report under Time Report.
- Video tutorial: https://vimeo.com/1131394384
How can I use the Time Report?
- Step 1: Click on Reports
- Step 2: Click on All Reports
- Step 3: Click New Report under Time Report.
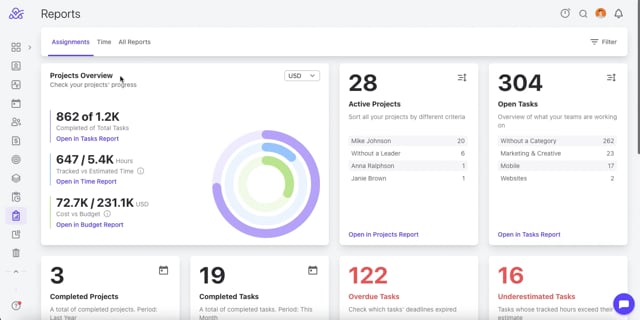
- Step 4: Click on Add Filter and select all of the desired filters from the following:
- Projects
- Project Category
- Project Client
- Project Label
- Project Leader
- Job Type
- Tracked By
- Tracked On
- Status
- Group By
- Step 5: Click on Run report once you are done adding filters.
- Video tutorial: https://vimeo.com/1127254399
How can I save a Preset in the Time Report?
- Step 1: Click on Reports
- Step 2: Click on All Reports
- Step 3: Click New Report under Time Report.
- Step 4: Click on Add Filter and select all of the desired filters from the following:
- Projects
- Project Category
- Project Client
- Project Label
- Project Leader
- Job Type
- Tracked By
- Tracked On
- Status
- Group By
- Step 5: Click on the Save Preset icon once you are done adding filters.
- Step 6: Enter the preset name.
- Step 7: Mark “Visible to me” if only you wish to see it. Leaving this unchecked makes the preset available to all users.
- Step 8: Click on Save.
- Video tutorial: https://vimeo.com/1131399003
How can I use a Preset in the Time Report?
- Step 1: Click on Reports
- Step 2: Click on All Reports
- Step 3: Click Open Preset under Time Report.
- Step 4: Select the desired preset from the list.
- Optional: On Step 3, click on New Report. Then click on Presets in the upper left corner and select the desired one from the list.
- Video tutorial: https://vimeo.com/1131399462
How can I edit a Preset in the Time Report?
- Step 1: Click on Reports
- Step 2: Click on All Reports
- Step 3: Click New Report under Time Report.
- Step 4: Click on Presets in the upper left corner.
- Step 5: Click on the “...” next to the desired Preset.
- Step 6: Click on Edit
- Step 7: Enter the new preset name.
- Step 8: Change “Visible to me” if only you wish to see it. Leaving this unchecked makes the preset available to all users.
- Step 9: Click on Save.
- Step 10: Add/Remove desired new filters.
- Step 11: Click on the "Preset icon" to save these new filters to your selected preset.
- Video tutorial: https://vimeo.com/1131400040
How can I duplicate a Preset in the Time Report?
- Step 1: Click on Reports
- Step 2: Click on All Reports
- Step 3: Click New Report under Time Report.
- Step 4: Click on Presets in the upper left corner.
- Step 5: Click on the “...” next to the desired Preset.
- Step 6: Click on Duplicate
- Step 7: Enter the new preset name for the duplicate.
- Step 8: Change “Visible to me” if only you wish to see it. Leaving this unchecked makes the duplicate preset available to all users.
- Step 9: Click on Save.
- Video tutorial: https://vimeo.com/1131400716
How can I delete a Preset in the Time Report?
- Step 1: Click on Reports
- Step 2: Click on All Reports
- Step 3: Click New Report under Time Report.
- Step 4: Click on Presets in the upper left corner.
- Step 5: Click on the “...” next to the desired Preset.
- Step 6: Click on Delete
- Step 7: Click on Delete to confirm.
- Video tutorial: https://vimeo.com/1131401238
How can I export a .csv file from the Time Report?
- Step 1: Click on Reports
- Step 2: Click on All Reports
- Step 3: Click New Report under Time Report.
- Step 4: Click on Add Filter and select all of the desired filters from the following:
- Projects
- Project Category
- Project Client
- Project Label
- Project Leader
- Job Type
- Tracked By
- Tracked On
- Status
- Group By
- Step 5: Click on Run report once you are done adding filters.
- Step 6: Click on the Export to csv option next to the Run Report
- Video tutorial: https://vimeo.com/1131401824
How can I add/remove columns from the Time Report?
- Step 1: Click on Reports
- Step 2: Click on All Reports
- Step 3: Click New Report under Time Report.
- Step 4: Click on Add Filter and select all of the desired filters from the following:
- Projects
- Project Category
- Project Client
- Project Label
- Project Leader
- Job Type
- Tracked By
- Tracked On
- Status
- Group By
- Step 5: Click on Run report once you are done adding filters.
- Step 6: Click on the Project Option icon below the Run Report
- Step 7: Select/Deselect the desired columns. You can choose from: Job type, Tracked on, Client, Project, Task, Description, Status.
- Video tutorial: https://vimeo.com/1131402674